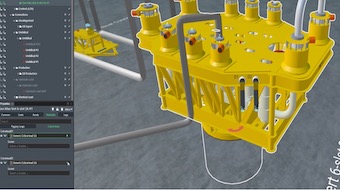
Asset Library
The first step when creating a new project in FieldTwin is typically to design a new field layout. To achieve this you can quickly and easily design the wanted field layout by using the design tools. The Asset Library section is where you will find the overview and information on all the available asset libraries available for your subscription. The default library will be the Generic library for standard subsea and topside assets including vessels, which also includes Wind and other Renewable Energy assets.
Assets will typically be design elements that depict subsea installation structures or other operational equipment such as "Manifolds", "Templates", "FPSOs", "Wind Turbines" etc. At the moment "FieldTwin" comes with a generic library of the most commonly used structures and vessels, but we will soon provide additional libraries. In addition we will also offer the capability to add your own custom assets and meta data to the "Asset Library".
Any Private Asset Library registered to your account will also be shown here.
Filter Assets
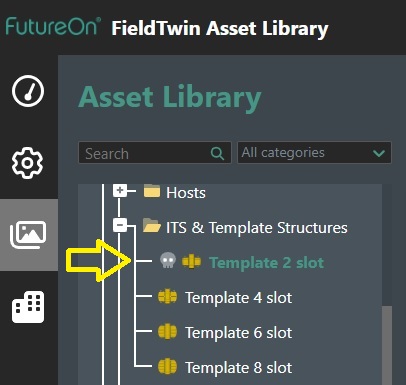
You can filter the "Asset Library" by type by selecting the appropriate category selection from the drop down filter as shown here:
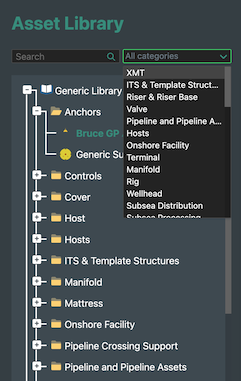
Simply select the asset category from the drop down list to display that category. This will then only display the assets in the selected category.
You can also use the search functionality using a key words to find what you are looking for.
Asset Details
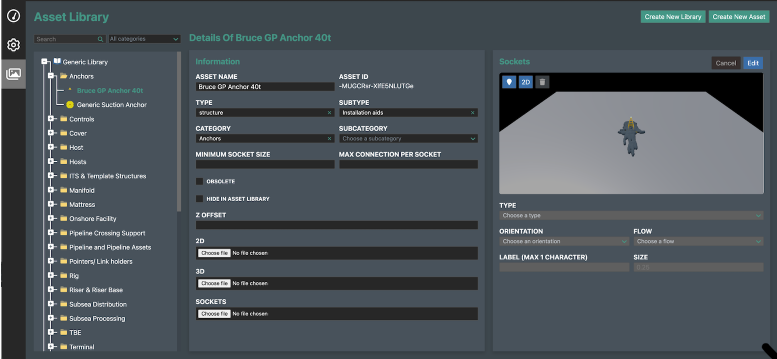
If you are an account admin you can view all the registered details on an individual asset.
Simply click on the Asset Name This will display an area called information with all the asset details registered as shown below.
Asset - For the asset itself you have the following information available and asset viewing commands:
-
Asset Name - Here you can edit the asset name.
-
Asset ID - This is the unique asset ID created by the system and cannot be changed.
-
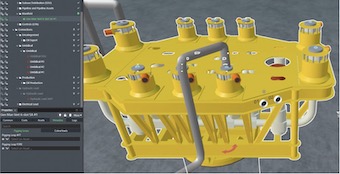
Viewing Window - This is a window you can navigate to view your chosen asset from different angles. Using the same navigation techniques as inside FieldTwin.
Socket - When you select a socket in the asset view area you will be able to view/edit the following section:
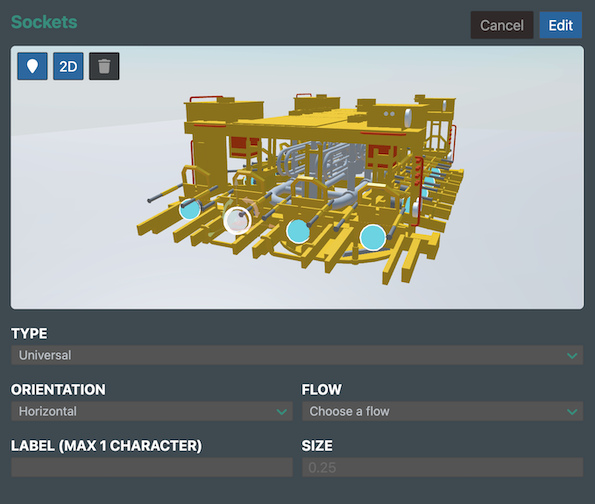
The fields you can view edit are:
-
Connector - Set the connection type for the socket e.g. Universal, Umbilical, Oil Production, etc. by selecting it from the drop down list.
-
Label - Set a alphanumeric label that will be displayed inside the socket. Note! One character only.
-
Orientation - Select if the connection is of type Horizontal or Vertical e.g. connection system.
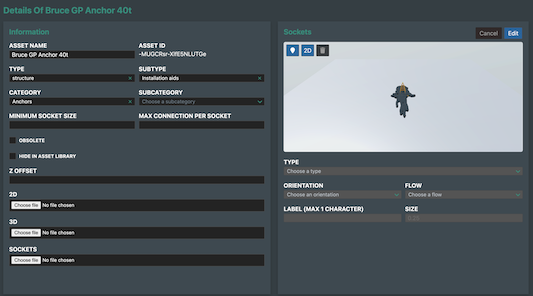
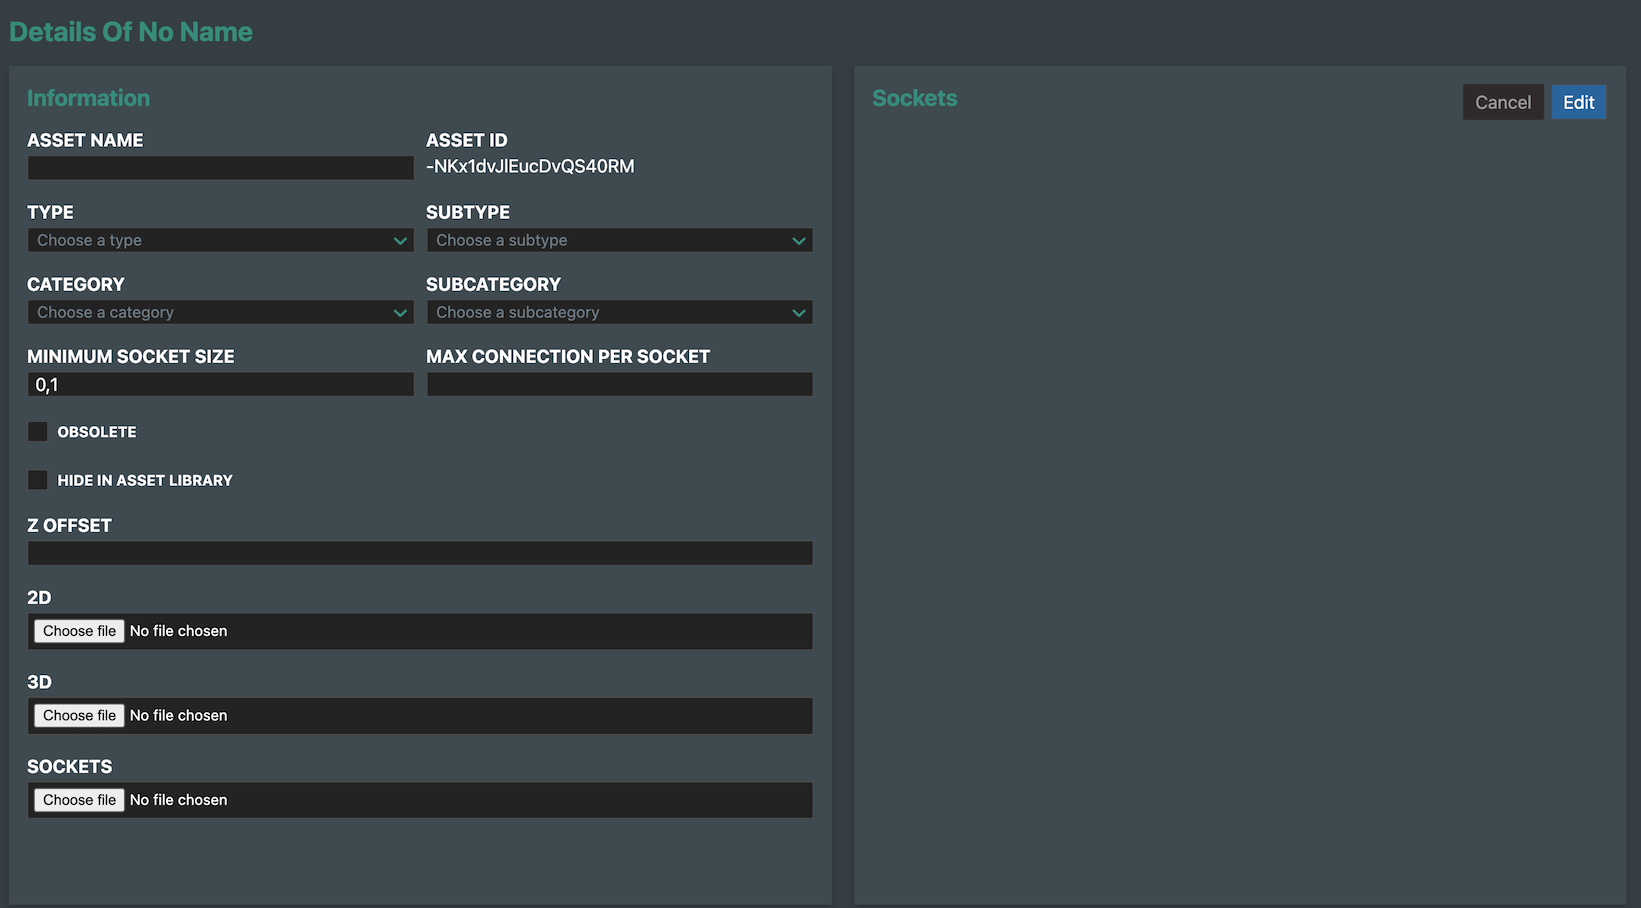
Information - For the asset itself you have the following information available to view/edit:
-
Asset Type - Here you can change the asset type from the drop down list e.g. structure, vessel, submerged etc.
-
Asset Sub Type - Here you can change the asset sub type from the drop down list over what has been defined e.g. SPS, piping, host, rig etc.
-
Category - Here you can change the asset category from the drop down list e.g. XMT, Template, Riser Base, Valve etc.
-
Sub Category - Here you can change the asset sub category from the drop down list
-
Max Connection per socket - Define the maximum number of connections you can make to this socket.
-
Minimum Socket Size - Define the minimum socket size.
-
Obsolete - Check this box if this asset has been made obsolete. This will then be marked as obsolete in the projects as indicated by the icon shown below:
When you open a project in FieldTwin Designer you will then also see the Obsolete asset indication in the Project View as shown below:

-
Z Offset - Set the Z offset delta value, which will raise or lower the connection point on the asset it self if it is incorrectly positioned.
-
3D - Press the file select button to select the 3D model file to publish. This would be a .glb file, which contains the colours and 3D information.
-
2D - Press the file select button to select the 2D model file to publish to show as a thumbnail in the asset tree.
-
Sockets - Press the file select button to select the socket file to publish. This is a text file that defines the socket locations.
Create Asset
If you have the right admin privileges and your company has been trained and certified by FutureOn for the self publishing of Assets you will also see the following "Create Asset" button in this screen.
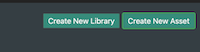
Pressing this button will present the same screen as the usual asset information view, but without any information filled in. See the Edit Asset section above for information on all the fields to fill in.
Added support for recursive smart models
You can now create smart models comprised of several sub models allowing you to build complex custom models. For this you need to have some smart assets in your library and add accurate metadata (contact customer success for details)
How to use it?
1 - Select your asset
2 - In the property panel, use the ‘metadata’ tab
3 - Build your own model
4 - Example with a manifold
Step 1: Select your manifold
Step 2: add a pigging loop
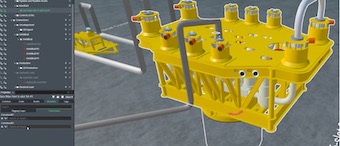
Step 3: add 2 cobra heads