Release Notes
Release 8.0
Released on: January 31st, 2024
This major release version introduces an entirely new backend architecture and database for the FieldTwin platform that is purely event stream driven. These changes in architecture allows us to offer better Change Management Control for projects and workflows, project versioning and audit trails as well as project time travel capabilities. In addition you will now experience greatly improved project loading and rendering speed by a factor of 7-10x.
Important Upgrade Information
FieldTwin 8.0 introduces an entirely new backend architecture and database for the FieldTwin platform that is purely event stream driven. These changes in architecture will allow us to offer better Change Management Control for projects and workflow, project versioning and audit trails as well as features such as Project timeline. Note! Since this version has a complete new backend the release roll out will be staggered with our customers having Staging Tenants being upgraded first. This is intended to verify complete backwards data compatibility and user acceptance as there is no roll back option unless we redeploy 7.1 with the latest backup. Customer Success will be in contact and discuss suitable upgrade dates over the next few weeks.
Dashboard Changes
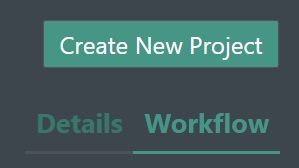
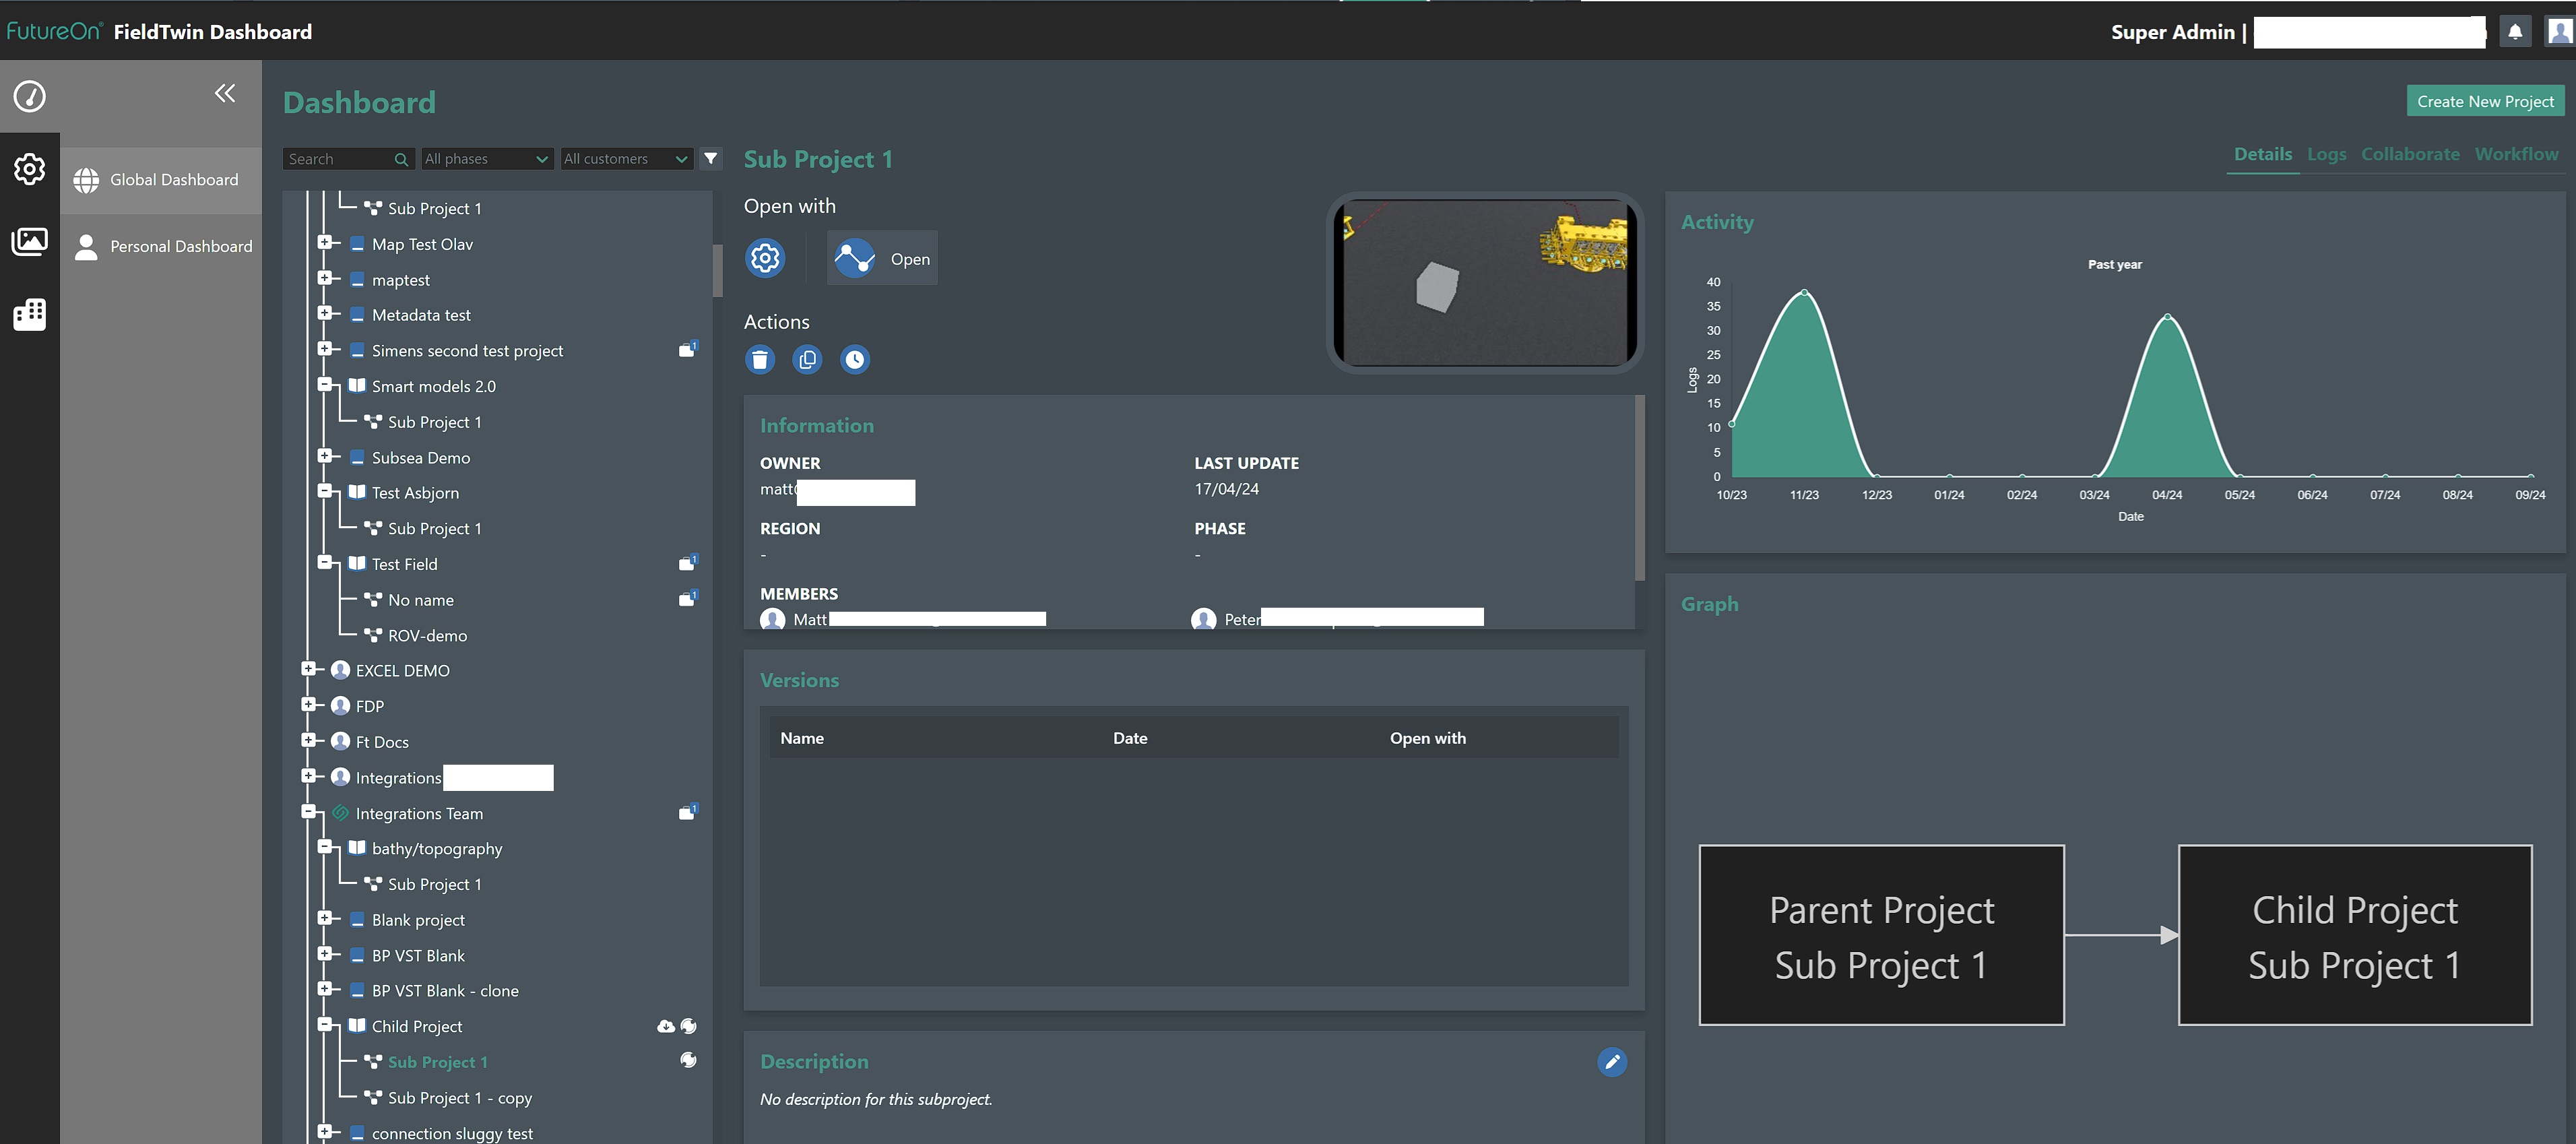
You can now switch directly from the old Project Details view into Workflow view by clicking on it as shown below instead of using the left hand sidebar icon:
Create a version
You can at anytime create a version of the current viewed project by using this command. This will create a version bookmark in the event stream that allows you to go back to this specific version stamp at any time. Read more here Create a Version.
Open a version
This command allows you to open any version of the project that has been created by the Create a Version command. Read more here Open a Version.
Restore a version
If you have selected a sub project in the Dashboard then you will see a new Versions section. This will display the following information:
-
Name - This displays the version name.
-
Date - The date of the version.
-
Open With - Shows the launch icons of the available application you can open the sub-project with depending on your user license.
-
Restore - This allows you to restore the selected version from the list into a new Branch.
Read more here Restore a Version.
Project timeline
This command allows you to go back in time to any date and timestamp from the project creation date until present by selecting a desired date and time. Read more here Project timeline.
Workflow Changes
-
Tasks now has the option to set the start date.
-
You can click on any calendar date with tasks notification to see the Tasks for that date directly in the calendar.
Other features
-
Export Designs in GLTF format. This function will export the entire field layout shown on the stage in the current sub-project in GLTF file format. You can then load this up in any GLTF viewer, insert it into MS Powerpoint, or even load it into the Unreal Engine. Read more here Export Design
-
You can now close properties tabs by clicking on the x icon under properties:

- You can now reopen closed property tabs from the Tabs drop down menu:

- Added a Pretty Mode button for quickly enabling visual presentation effects on the Viewport Toolbar

-
Added a Go to position dialog under the Tools Menu.
-
Added a Snap connection to assets dialog under the Tools Menu.
-
You can now link a Document to all existing assets of the same type.
-
Shapes can now also be snapped to Wells.
-
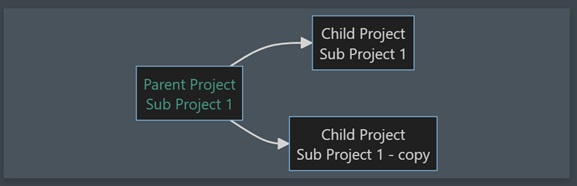
If you select a project that is part of a parent <-> child relationship the Dashboard now displays a Visual graph of the relationship:
-
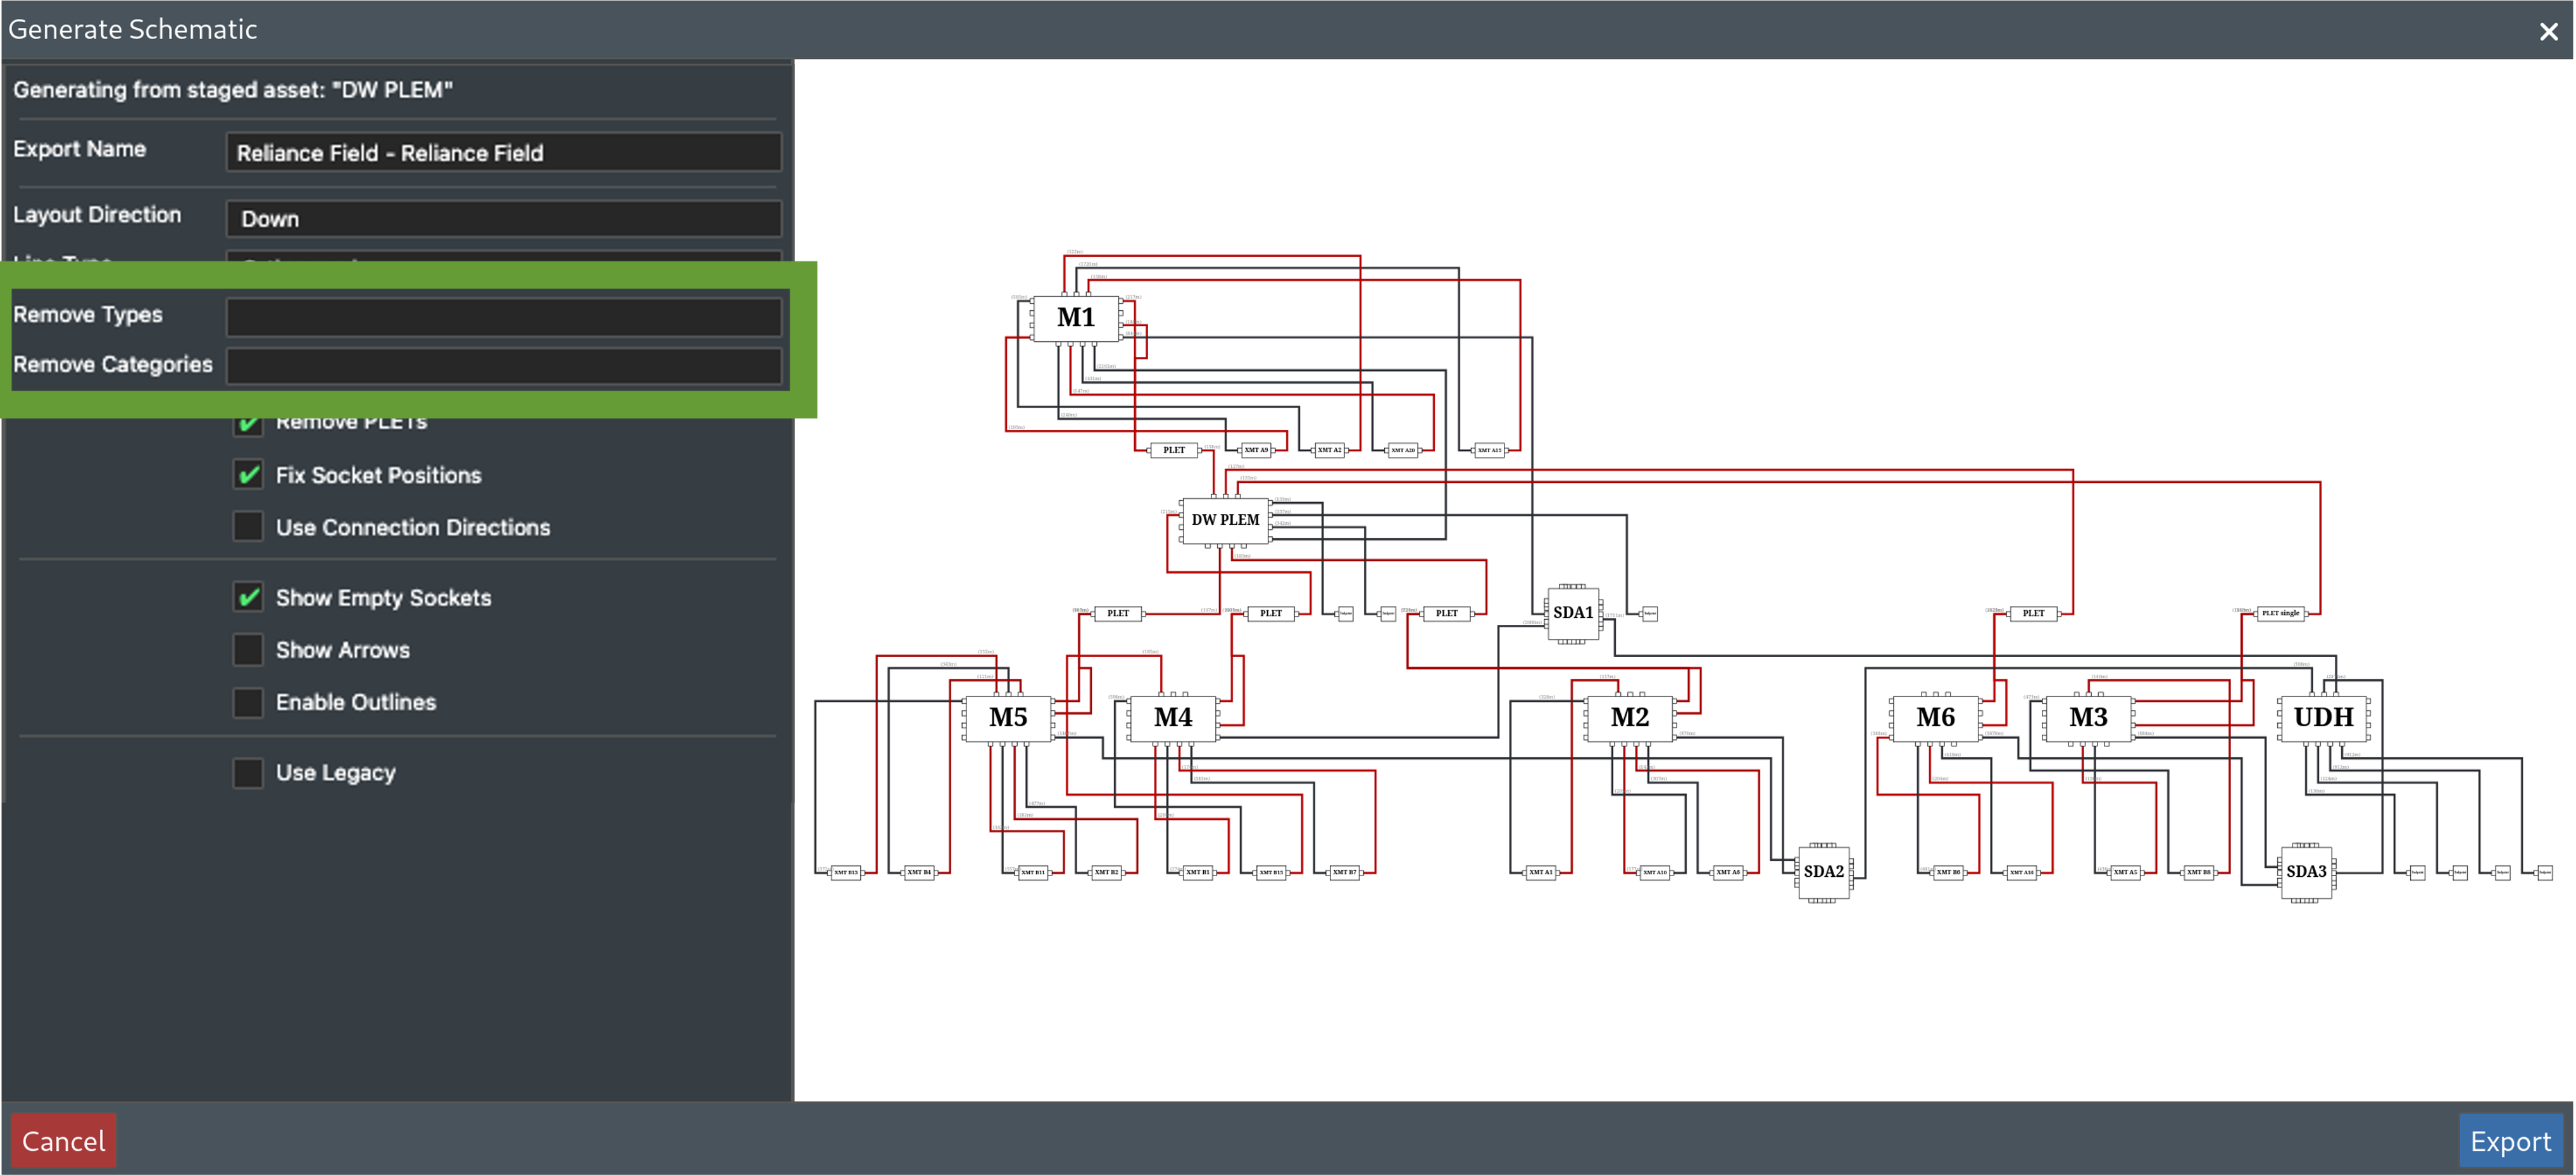
Generate Schematic now has a new exclude option for Tags, Types, and Categories.
-
You can now invite Groups of users to a project. Read more here
-
An API token can now be assigned a User Role when creating it in the Account Settings. Read more here
-
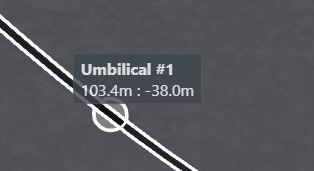
Clicking on a connection will now always show information on the relative distance from the nearest KP point when you move your mouse.
-
Any Metadata on connectors will be displayed in Viewport by hovering over the connection point with the mouse. Read more here
-
You can now Right click on a Connection point to edit metadata. Read more here
Compatibility Issues
Due to the brand new backend and database architecture introduced with the 7.2 Early Access not all FieldTwin functions will support backwards compatibility at least initially. This section will describe the current limitations:
- Account Settings>Import/Export - At present Import of FieldTwin Data from 7.1 and earlier is not supported.
Release 7.2 Early Access
Release date: October 2nd, 2023 Note! By invitation only
Early Access
This Early Access version introduces an entirely new backend architecture and database for the FieldTwin platform that is purely event stream driven. These changes in architecture will allow us to offer better Change Management Control for projects and workflow, project versioning and audit trails as well as new features for later releases such as project time travel and branch compare. The Early Access version exposes very few new features as this release is intended solely to verify complete backwards data compatibility and product stability & quality.
-
Greatly improved project loading and rendering speed.
-
For a sub project you can now Create a Version.
-
For a sub project you can now Open a Version.
-
For a sub project you can now Restore a Version.
-
For a sub project you can now Time travel.
-
You can now close properties tabs by clicking on the x icon under properties:
- You can now reopen closed property tabs from the Tabs drop down menu:
-
Added a Go to position dialog under the Tools Menu.
-
Added a Snap connection to assets dialog under the Tools Menu.
-
You can now link a Document to all existing assets of the same type.
Compatibility Issues
Due to the brand new backend and database architecture introduced with the 7.2 release not all FieldTwin functions will support backwards compatibility at least initially. This section will describe the current limitations:
- Account Settings>Import/Export - At present Import of FieldTwin Data from 7.1 and earlier is not supported.
Release 7.1
Release date: May 2nd, 2023
FieldTwin version 7.1 introduces a new application which is included with the standard and advanced FieldTwin offering called Workflow 1.0, more info can be found here,
Workflow
Workflow is an application within FieldTwin that will be used for task management within a project or account. The following features will be available in workflow:
- Create and assign workflow tasks to project users
- Task/Issue dashboard per project and per user
- Inbox for tasks showing the current status of a task
- Notification service will be available
- Tasks can be sorted into columns depending on their status
- Ability to add attachments to tasks, such as pdf’s or images.
- Ability to add comments to tasks in the Viewport
- Assets in the viewport can be linked to task/issues
- Clicking on a task opens the task in the viewport
- Clicking on the task in the dashboard will open at the correct location within a project where the task was assigned.
- Can see if a task has been solved by following a link via a notification in a task.
7.1 Features
in FieldTwin there are also new features based on customer feedback and request:
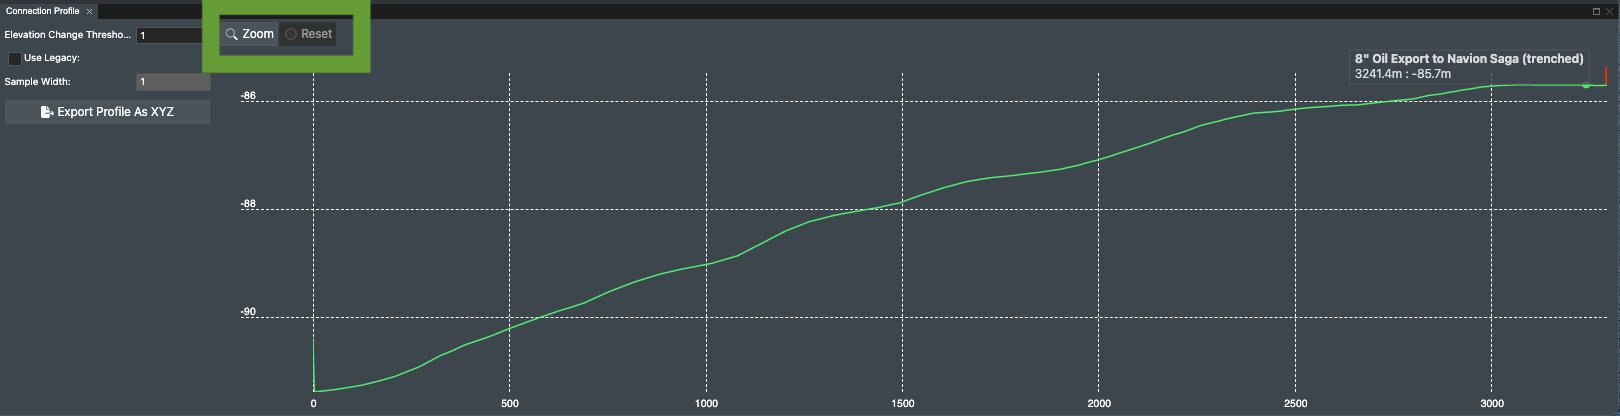
- The ability to zoom in the connection profile tool, clicking on zoom and then selecting the part of the profile that you want to zoom in on.
- Being able to filter by connection type in the Schematic generator.
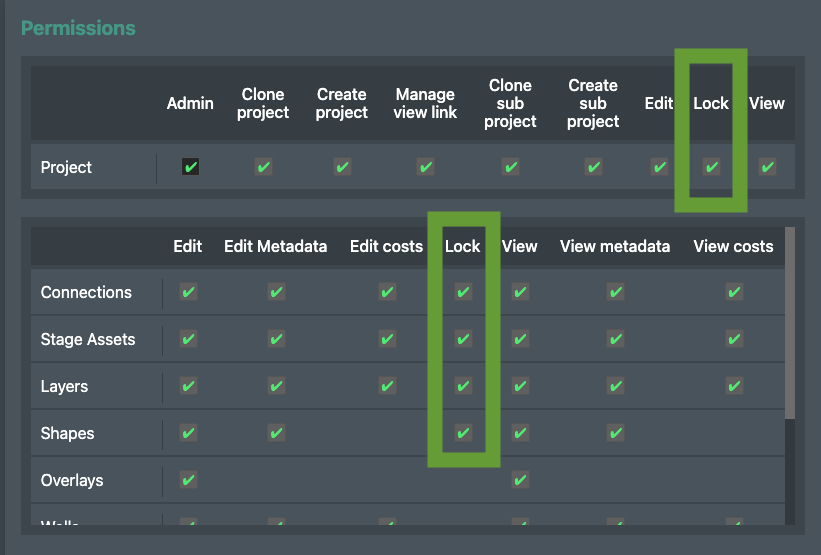
- User rights for locking and unlocking projects and different parts of that project
Release 7.0
Release date: January 1st, 2023
FieldTwin version 7.0 is a point release that represents a shift in UI for the dashboard view and project settings as well as all account settings and configurations, signalling a shift in UI framework to a more efficient and modern codebase.
- Optimisation done on connection rendering will reduce loading time and increase performance significantly.
- Tree view alert when objects has documents attached
- Introducing global metadata definitions
- Introducing smart models
- Advanced lighting and render effects for realistic view
- Introducing the schematic generator that allows you to generate schematic renderings of your layout with multiple options.
- Supporting new well formats
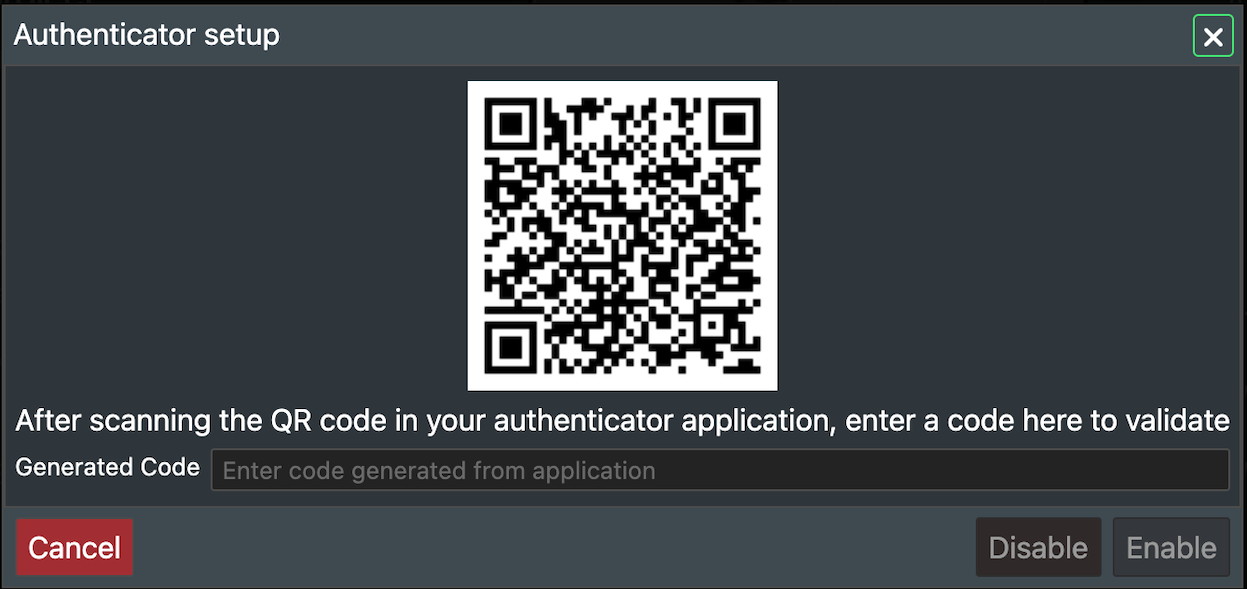
- Support for authentication applications for user login.
- Able to import metadata by tags for accounts
- New asset library editor for real 3D access to models
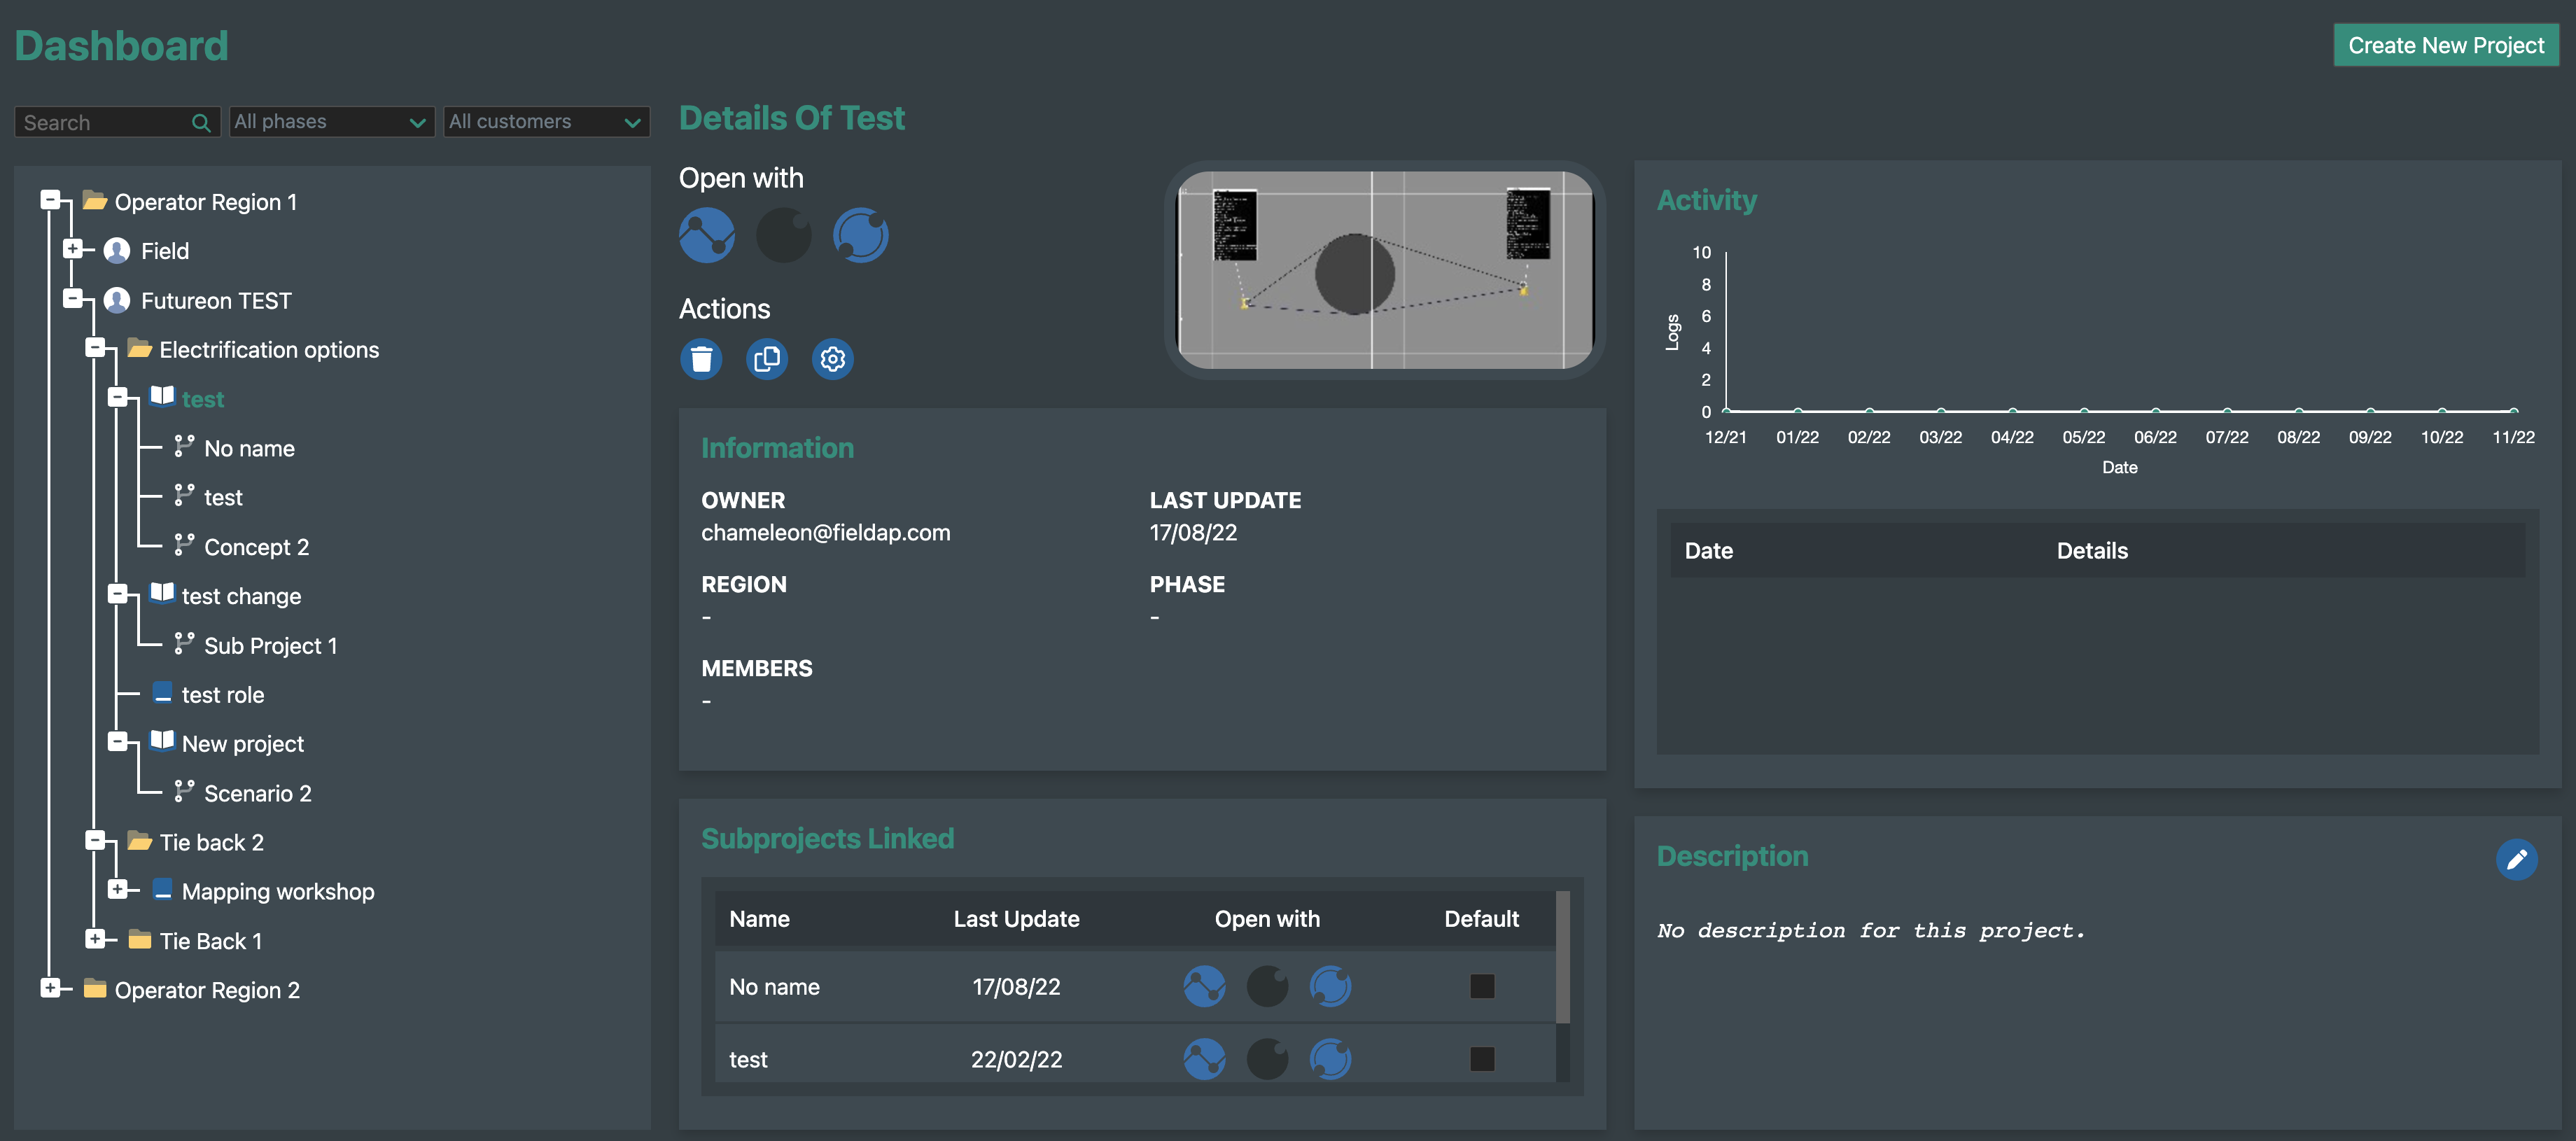
New Dashboard
Key Features:
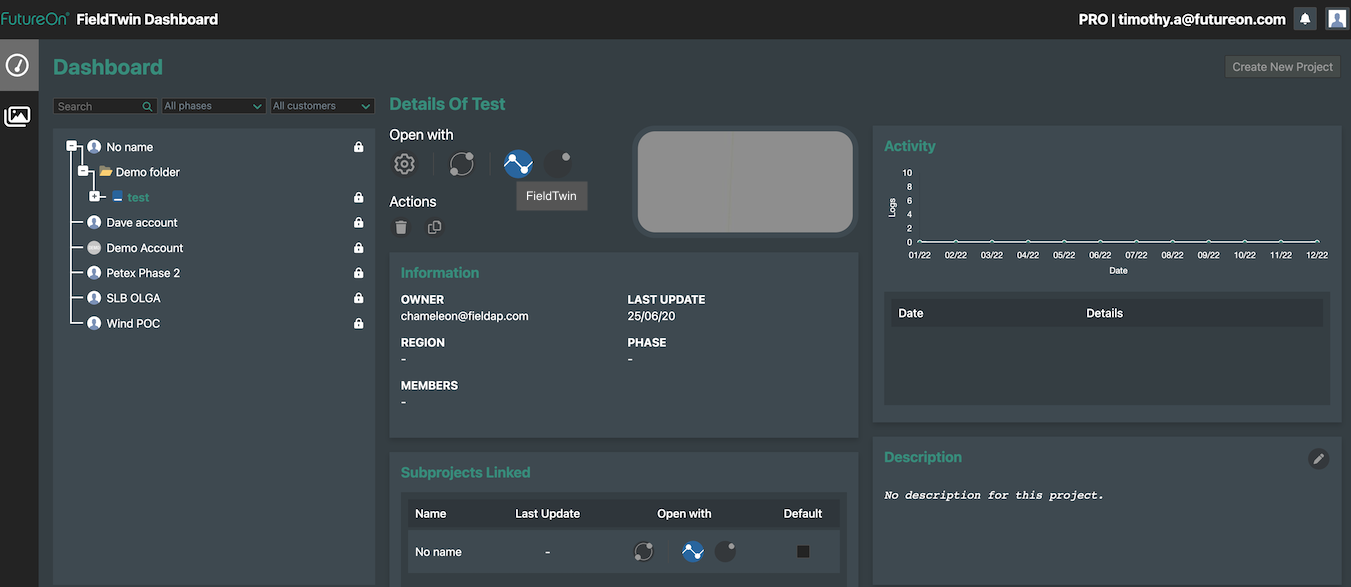
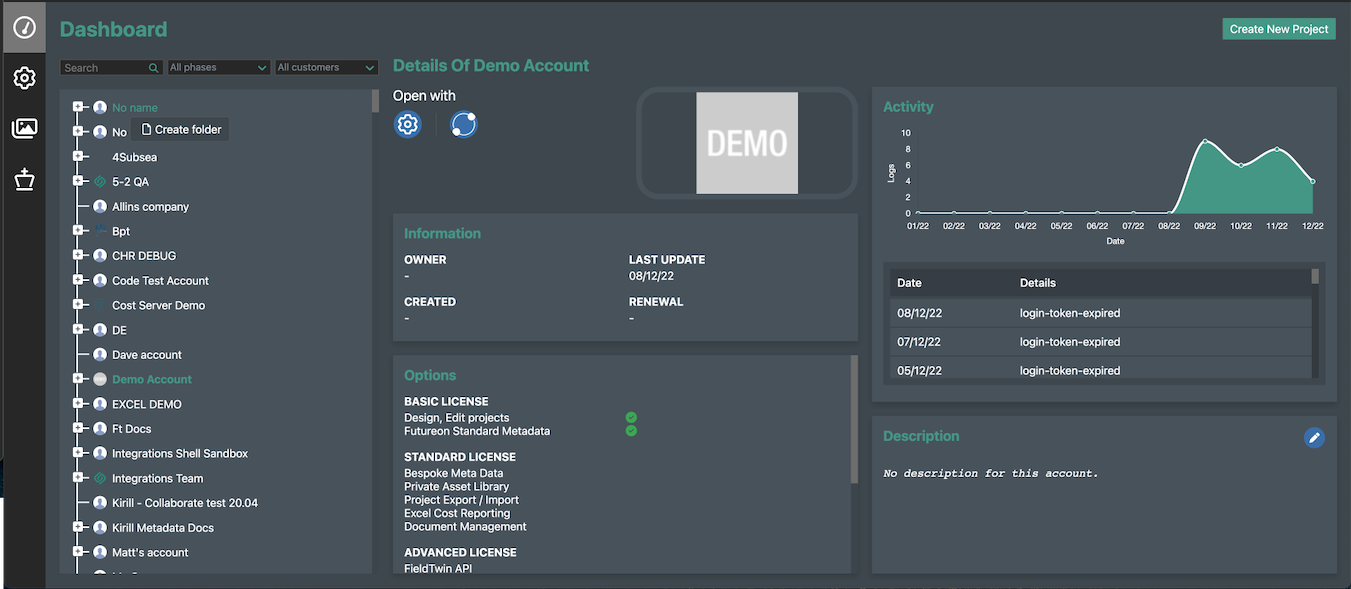
The new rewritten Dashboard presents all active project in a tree-view, it supports creating custom folders on every level (company wide, account or project for all users).
- All integrations are listed that are currently used in the selected project
- You can open Sub-projects directly from Dashboard
- Activity logs can be accessed directly after selecting a project/subproject
- Descriptions can be added for accounts, projects and sub-projects
- Use Filters to search and list projects quickly in the new, optimised tree view
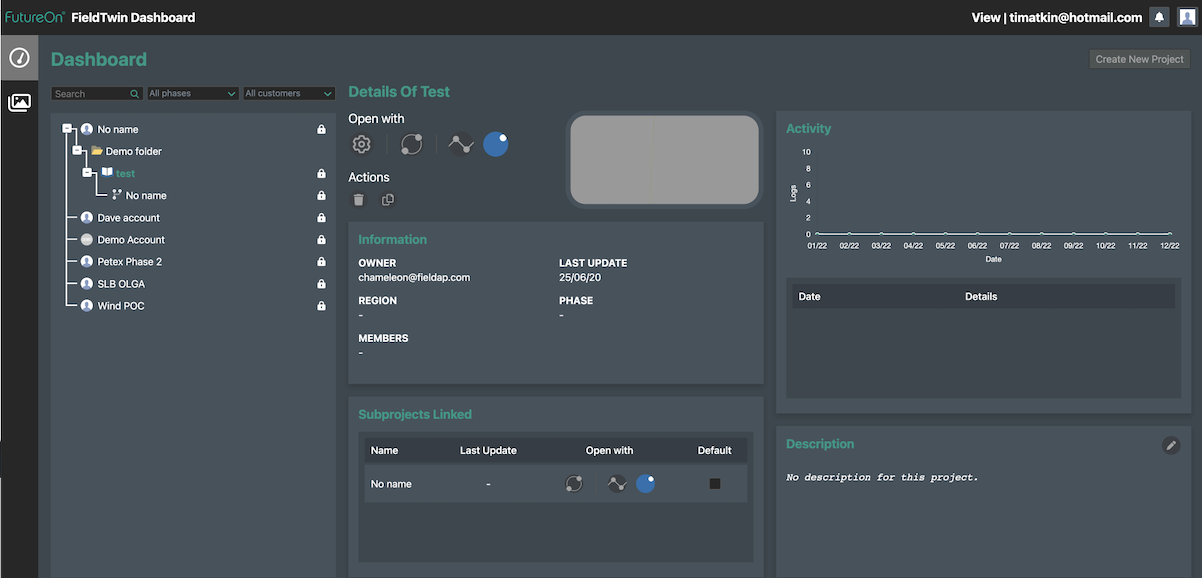
Dashboard for Pro Users
Key Features:
- The project tree is limited to accounts and projects that have either been made public, or projects that the user have been invited to.
- Pro users don’t have access to admin, or have the ability to enter project settings.
- Pro users can open the project in FieldTwin
Dashboard for View Users
Key Features:
- The project tree is limited to accounts and projects that have been made public or projects the user has been invited to see.
- View users don’t have access to admin, or have the ability to enter project settings
- View users can only open the project in view only mode
Folder structure in the Dashboard
The folder structure creation can be restricted along with their configuration, so that it can be optimised for all projects and fields within a company. This access is controlled by the user rights set in admin.
How to use:
- Right click on a tree node to create folders
- Create the folder name
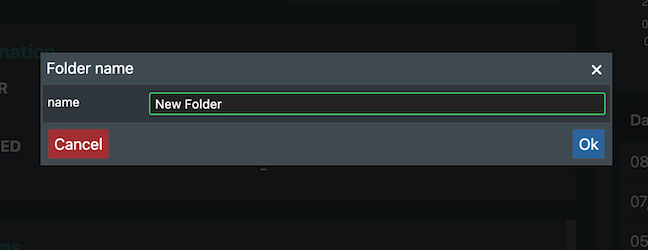
- Once the folder is created move your desired projects into the desired folder using the drag and drop functionality.
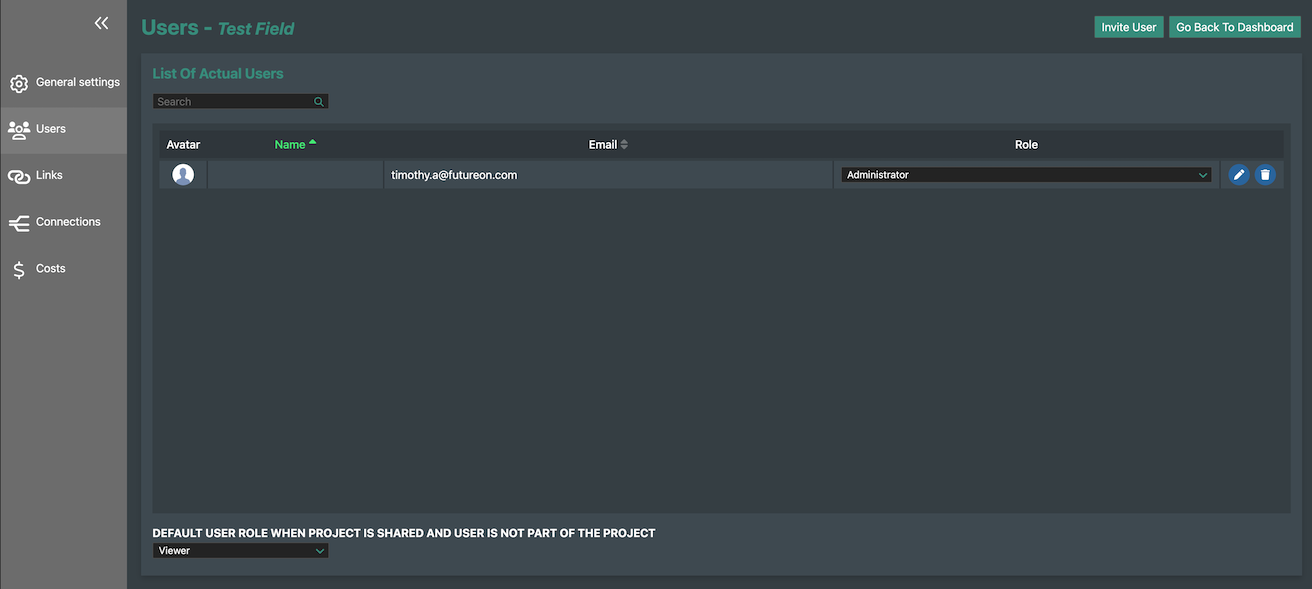
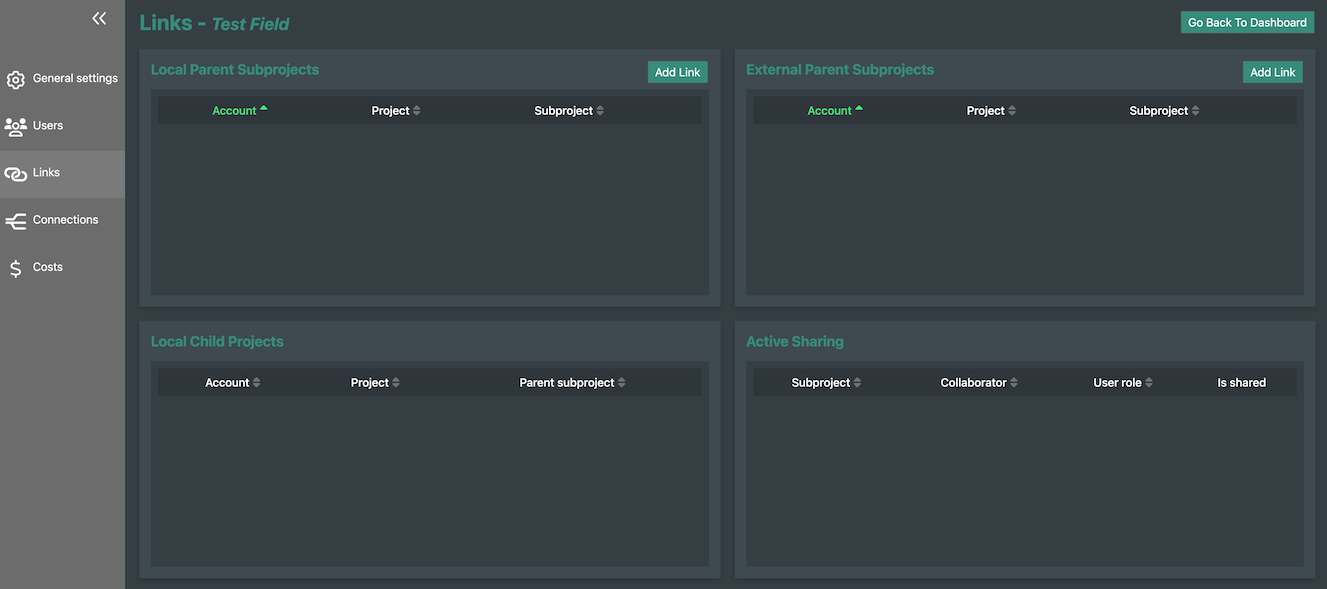
Project Settings
A new Project settings UI brings all the existing functionality into a more refined design.
The General settings bring all the project specific details into one place.

User details and assigned role will be listed in the user settings tab.
All project sharing both internal and external via collaborate are listed in the link tab.
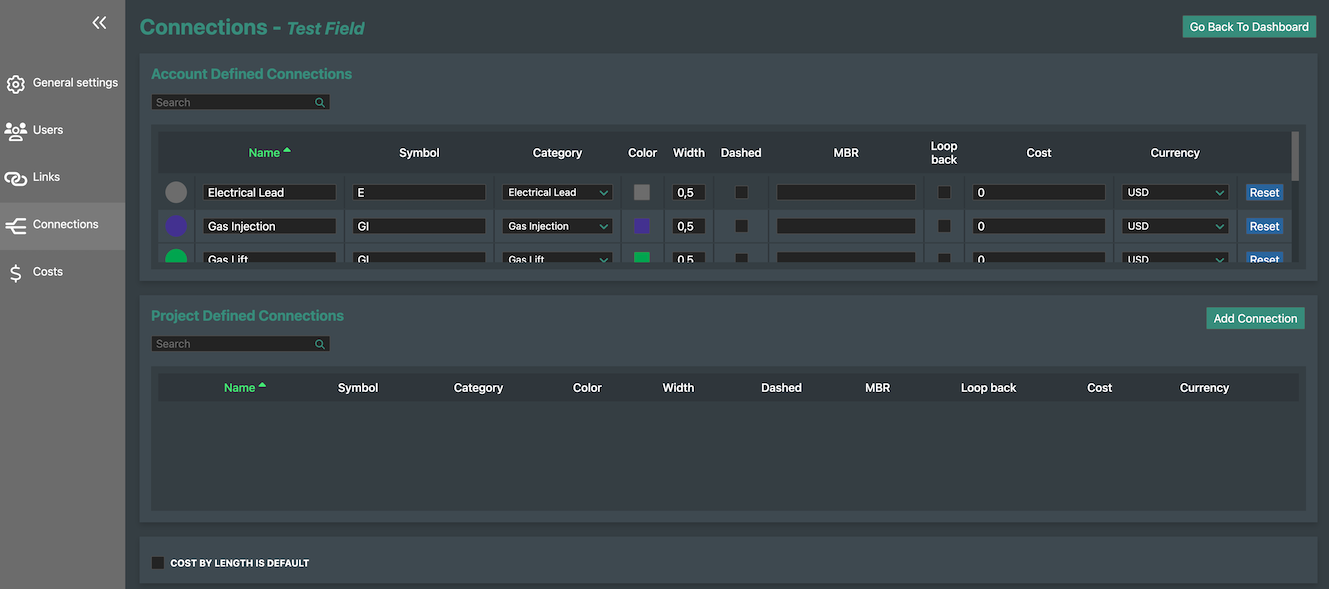
Both account defined and project defined connections are in the same tab.
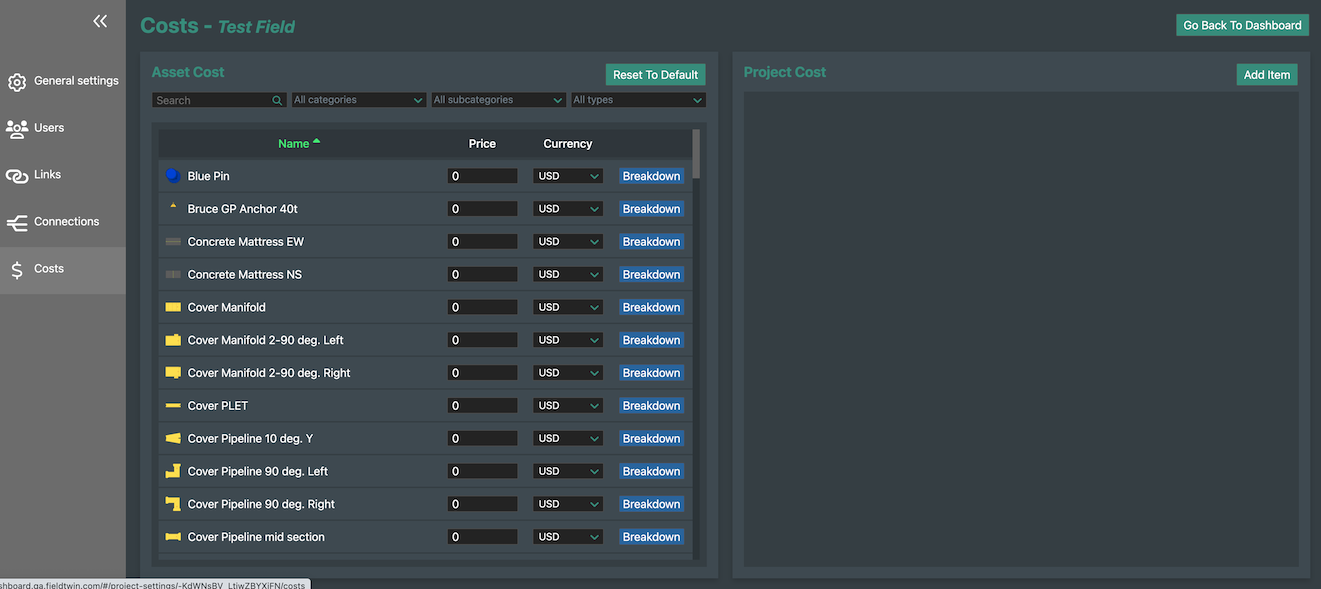
Costs for both the assets and project level costs are found in the cost tab.
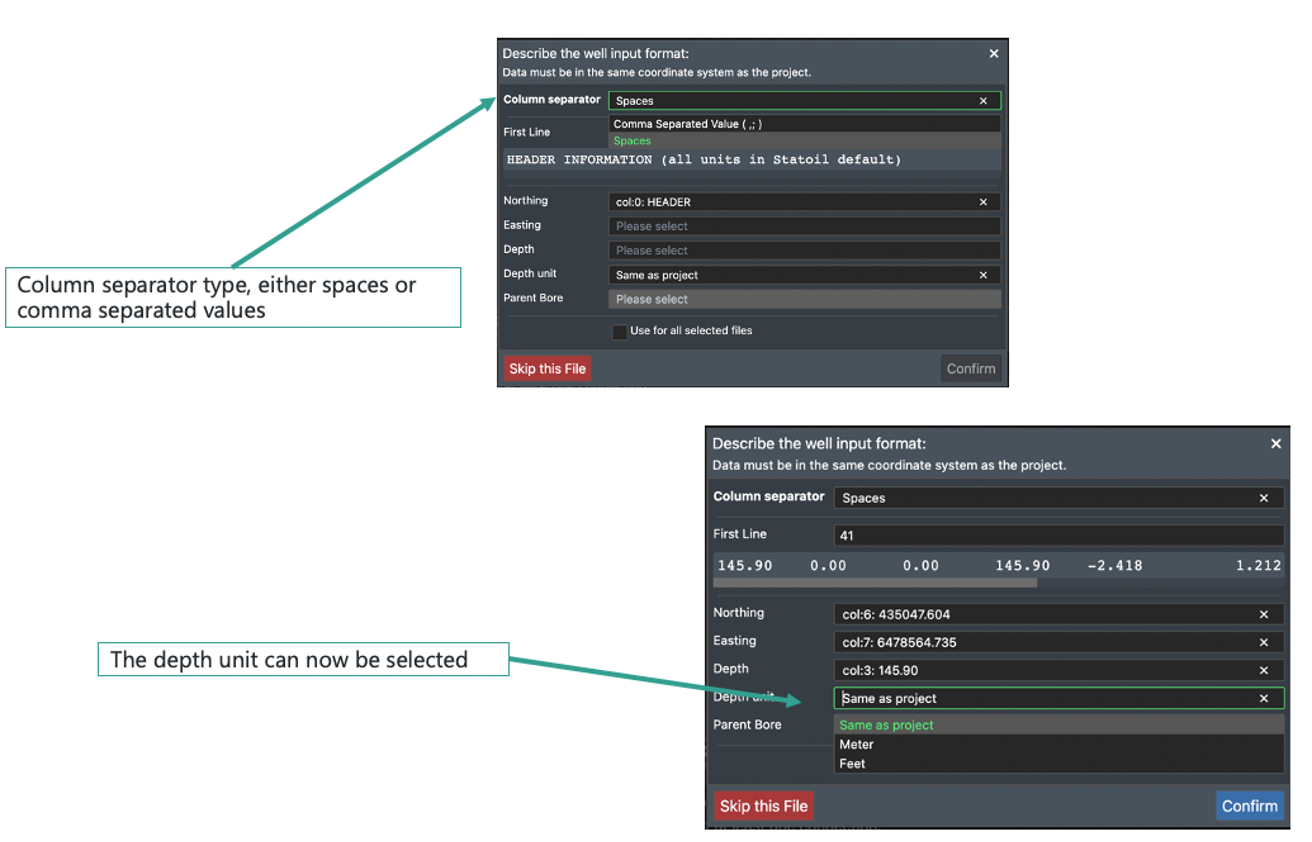
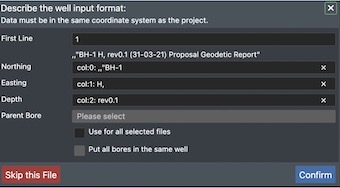
Well Import Improvements
New functionality has been added to the Well Import feature:
User access with Authenticator app
In the user settings area, you can now select Authentication and then setup with your chosen Authenticator app using the QR code.
Alerts when objects contain documents
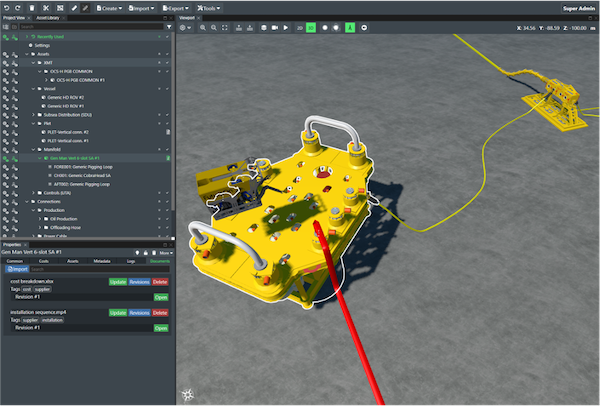
If a document has been associated with an object you will now see a new icon in the tree view alerting this and how many it is. By clicking on the icon, you will see the content of the files attached for easy viewing
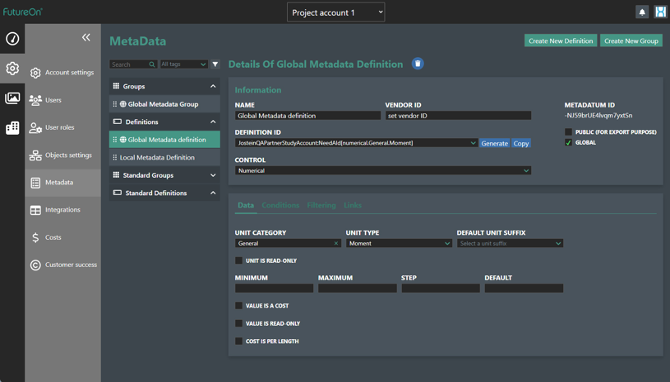
Global Metadata Definitions
With the use of Global Metadata definitions, you can set definitions to be accessible across multiple accounts. You will then have the freedom to use a company wide standard set of metadata definitions and groups in addition to local created definitions that only will be available in a specific project account.
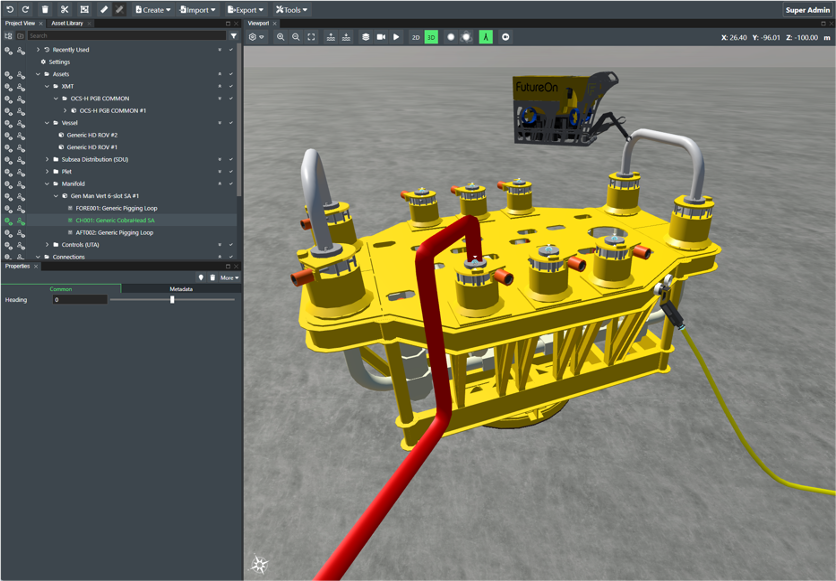
Smart Models
With the Smart models we can create complex models that will be configured by Metadata definitions.
- This allows connectors or modules to be added on to an existing model on the stage.
- The newly added smart model will be listed in the tree view below the parent model and can have its own metadata definitions and heading.
- It will also be exposed to export and the API (excel or cost)
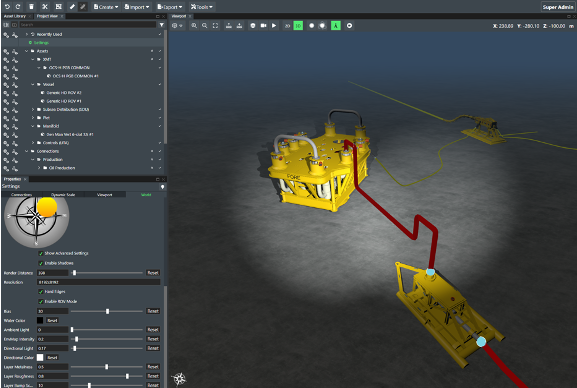
Advanced settings for lighting and realistic scenarios
Introducing lighting effects (above and under water) including realistic ROV lighting as well as additional light and resolution settings to be able to create more realistic images

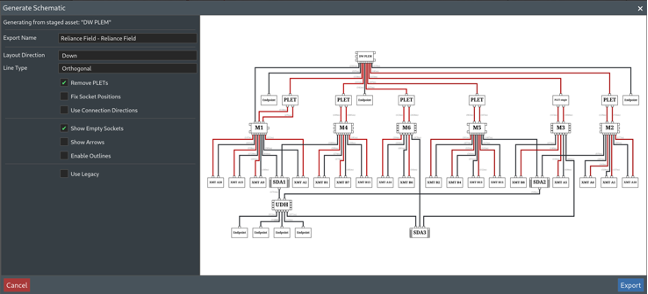
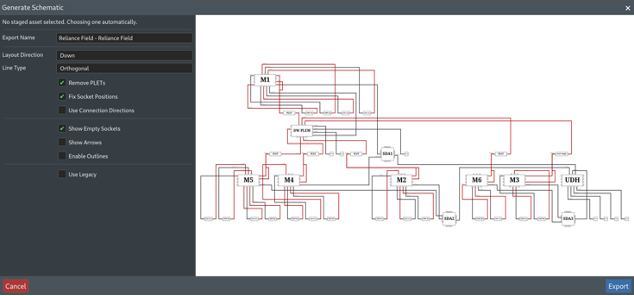
Schematic Generator
The new Schematic Generator gives users the option to control how a schematic layout can be generated. Using an algorithm for optimised schematic layout which considers user input settings, such as:
- Removing plets from the layout
- Generate connection points in their actual position or a layout optimised position
- Set the direction of flow on pipelines
- Show Empty connection points (to identify future possibilities)
- Toggle arrows on or off on all connections
- Enable outlines
- Choice to use the legacy schematic generator from version 6.0
New Asset Library
The new Asset Library will give a direct 3D representation of all assets after selecting them in the new improved tree view.
This will give the users the ability to add new connection points and position them in 3D space for correct positioning.

Release 6.5
Release date: October 13th, 2022
Listed below are the new features, the benefits given and how to use them and also a video:
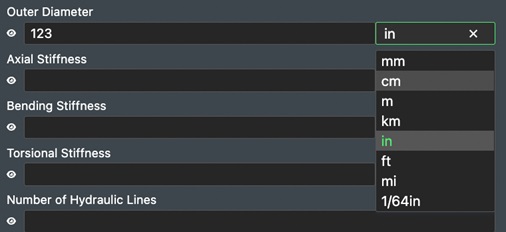
Convert value when changing meta data unit
FieldTwin Design support on the fly conversion of numerical metadata values if you change the Unit type in the UI. As an example you can change the unit for the Outer Diameter shown below:

So to change this from inches to e.g. centimetres you select centimetres from the units drop down list as shown here:
This will the present the following dialog box to confirm the unit conversion:
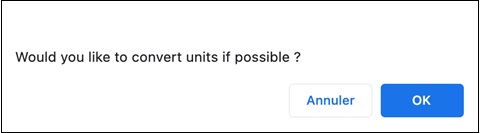
Please Note!
Be aware that our unit conversion system may not be able to support all conversions!
After a successful conversion the result will show in the metadata value reflecting the new unit selection.

Setting Viewpoint as default view
You can also use View Points to set a Default View, which if set will be the current view when opening a project. You do this by right clicking the created View Point in Project View to bring up the context menu as shown below:
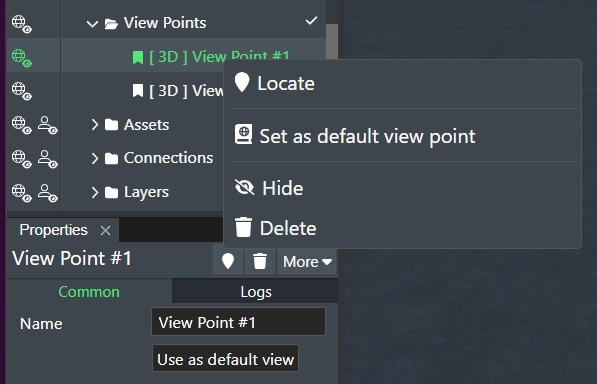
Note! You can also click on the Use as default view button in the property panel.
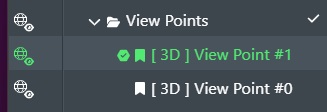
Once this is set you will see a checkmark next to it in the list of View Points in Project View:
The next time you open the project the View Port will display the 2D or 3D view specified by the default View Point.
You can remove the default view point by right clicking the entry and selecting Unset default view point.
Display operator and supplier tags in project view
If you have added unique Operator Tags, which usually references unique Equipment IDs related to their other systems on Assets or Connections they will then also show up in Project View List as shown here:
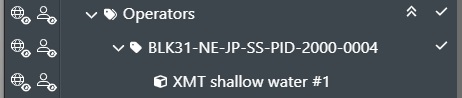
If you have added unique Supplier Tags, which usually references unique Equipment IDs related to their other systems on Assets or Connections they will then also show up in Project View List as shown here:

Generate Contour as SHP
This will generate a contour map of the 3D seabed (bathymetry) and save it as SHP file, which you can then load up in another application. This will display the following dialog:
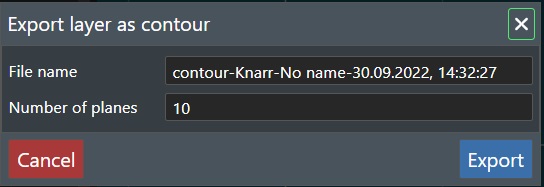
-
Name - Enter the filename you would like. The file will be stored as a ZIP archive file in your Downloads folder.
-
Number of Planes - This is the number of contour planes you would like. If e.g. the seabed has a 50 m elevation then using 10 will create a contour line for every 5 meters. The output will then look like this:

Manually input the length of a connection
When you have selected a connection, the length of the connection in units will be displayed in Length field. At the end of the length field you will see the unit system e.g. metric or imperial. If you move an asset with a connection attached or edit the connection path the length will be automatically calculated and shown. The length field is automatically updated in both 2D and 3D View mode. Note! If the connection is not connected at both ends and is of design type None or Standard you can manually set the connection length using this field. Otherwise this field is greyed out. Be aware that because of floating calculation limitation the value can vary (≈ 0,002m).
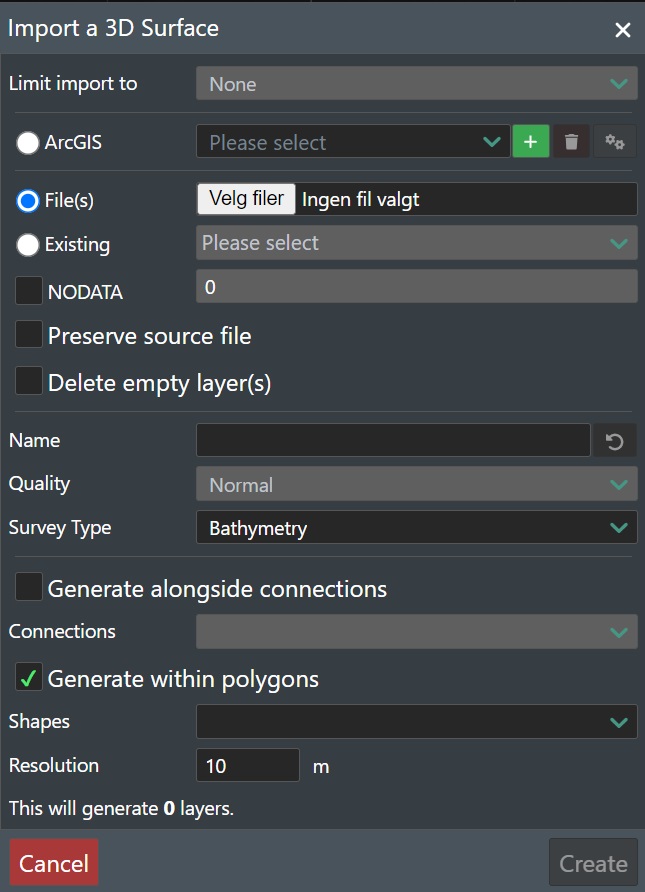
Preserve 3D Surface Source File
Check this box if you want FieldTwin to securely store the original file after upload so it can be used later for further 3D surface processing such as the Generate alongside connections option. If you do not check this option the original 3D surface file is deleted immediately after processing.
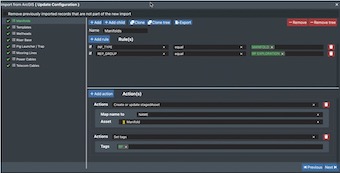
New Rule Engine Features
The Rules Engine allows you to create a set of rules with conditions when you import data from either a file such as a shape or an excel file or a ArcGIS Map server or which will trigger FieldTwin Actions that you create. New features in this release are:
- Supports Excel and SHP(shape files)
- Support for import/export of rules when using the files driver
- Support for setting description from rules
- Support for setting heading using attributes in the rule engine
- ArcGIS support for mapping domain and subtype to attributes
- String Meta Data are now mappable using the rule engine
- Operator, Supplier and normal TAGS are now mappable using attributes in the rule engine
- Staged asset status is now mappable using attributes in the rule engine
Read the Rules Engine Documentation for more information.
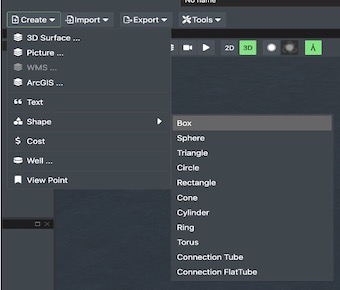
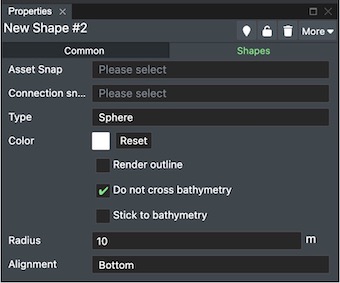
New Polygon Shape available
The Polygon shape will allow you to create a free form polygon on the ViewPort e.g:
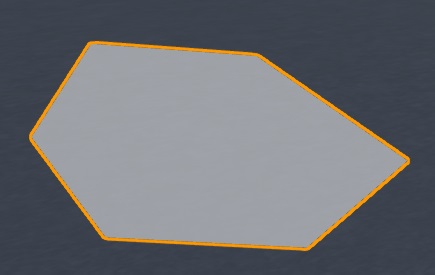
Read more here Polygon Shape
Support for display simulation results
This release now support display of simulation results with the Visualisation Tab for both connections and wells.
Read more here Visualisation Tab
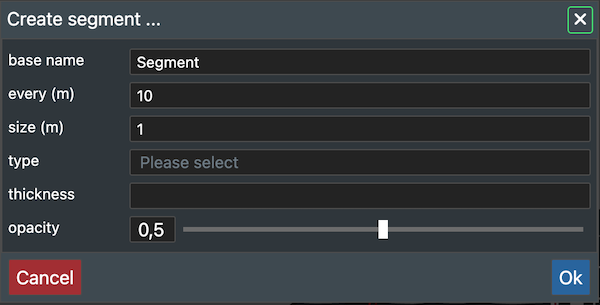
Well segments
To create more than one segment you can right click on the well-bore and click on the create wellbore segments every.... Here you can select the segment distribution, size (length), type, thickness and opacity.
Other new features
- Staged assets are now exported as oriented box for SHP and GeoJSON export
- Shapes now support Metadata
- Water Opacity is now set to 0 (fully transparent) as the new default
- When creating segments, if created from the viewport, place the segment closest to the mouse position
- Crossing Detector now support depth and options to not use connections from foreign project(s)
Release 6.4.1
Release date: July 2nd, 2022
Listed below are the listed new features, the benefits given and how to use them.
FieldTwin Admin
With the FieldTwin Design release of 6.4.1 all Administrative Settings e.g. Account Setting can now be found in the FieldTwin Admin application. You can find the online documentation here admin.fieldtwin.com.
Documents Tab
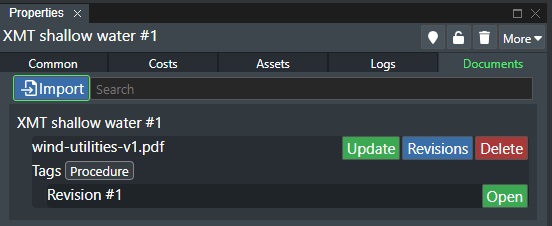
In the Document tab for the selected asset(s) or connection(s) you can directly upload associated documentation for that asset to FieldTwin secure storage so it stays with the project and can be accessed any time it is needed. It also supports revision handling of the same document. The Documents tab looks like this:
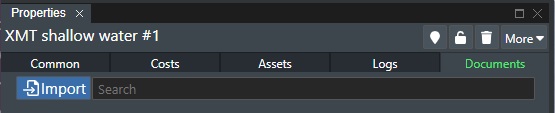
Import - Press this button to add a document for the selected asset. The following dialog will then be shown:
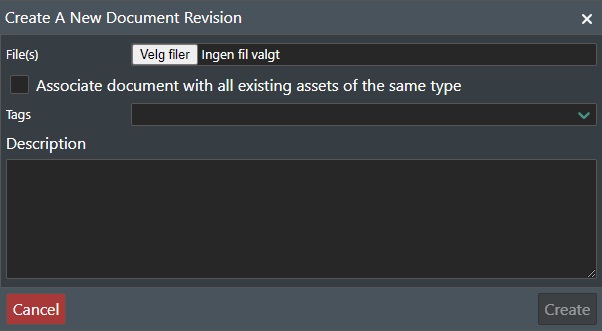
File(s) - Select the Choose files button to select the files you want to upload.
Tags - You can add descriptive tags here for the uploaded files.
Description - Add supplementary text if desired.
Press Create to upload the files to your FieldTwin Project, or Cancel to abort.
The uploaded file(s) will now be displayed in the Documents Tab as shown here:
Read the full documentation here Documents Tab
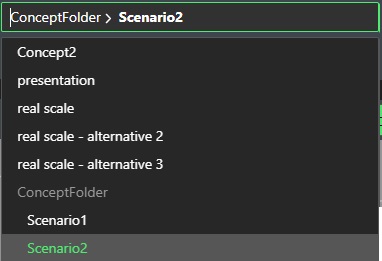
Sub-Project Folders
You can now create folders to group your sub-projects. To do this use "/" in the project name to create the folder. E.g. /Folder1/Folder2/Project Name
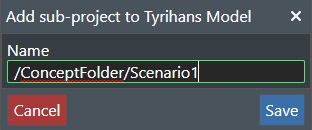
This will then give you a folder structure such as shown here:
Release 6.4
Release date: April, 2022 Listed below are the listed new features, the benefits given and how to use them.
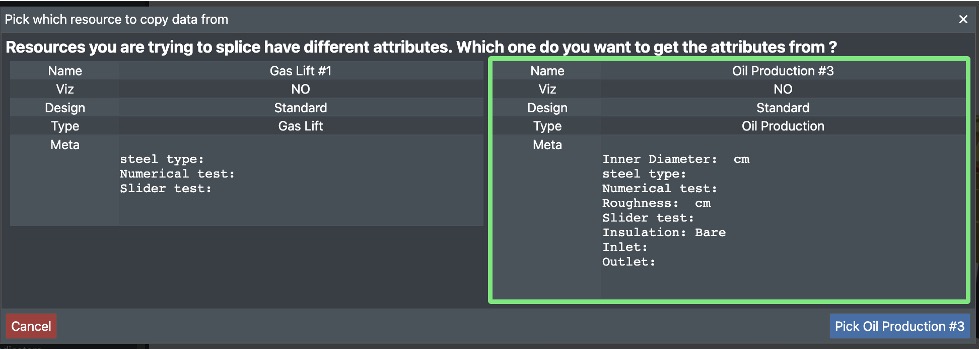
Splice/join two connections by connecting the endpoints together
Benefits
-
This is the opposite action of cutting a connection
-
You can now ‘splice or join’ 2 connections that have been cut before or 2 connections that have never been connected
-
You can splice 2 connections to display different connection types and individualised metadata for each connection. The system will ask you to select the data types that apply to the new connection that is generated
How to use it?
1 - Select a connection by dragging one of the end points
2 - Drag the end point onto ‘connection 2’ endpoint
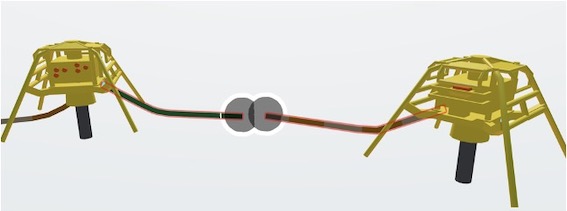
3 - When you release the mouse, the points will ‘merge’ and if connections are different, a dialog box will ask you to select the data you wish to apply to the new connection
4 - Click on the attributes you want to keep and click on ‘Pick Connection name’
5 - You can then check the property panel for your connection attributes
Allow for connections to loopback to an asset (if enabled in the account and project settings)
Benefits
-
Now you can connect a connection to the same asset at both ends and create a ‘loop’
-
This can be enabled in the account- and project-settings area
How to use it?
1 - Select a connection in your ‘connection’ page
2 - Check the ‘Loopback’ option
3 – After opening your project in FT design your connection can now be connected at both ends to the same asset
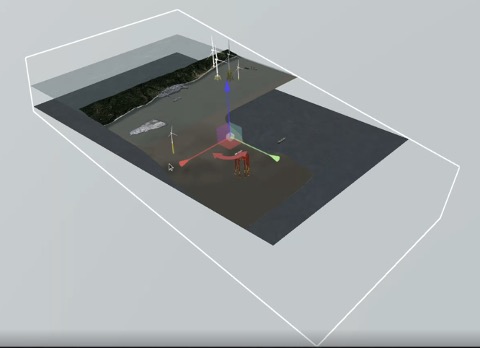
Clipping plane to see through layers
Benefits
-
This option gives you the opportunity to draw a cube that works as a clipping plane that ‘cuts’ through all your layers in the Viewport scene
-
This is very useful for presentations if you want to show your project with a view through your project layers
How to use it?
1 - Create a shape that is a box
2 - Select ‘Use as a clipping mask’ in the property panel
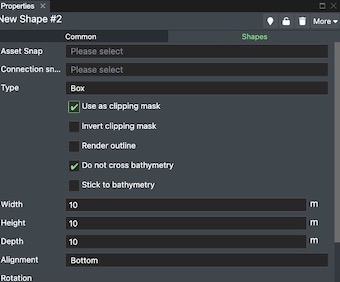
3 - Move your cube to cut your field where you like you can also input size, coordinates, depth, alignment etc. in the properties panel
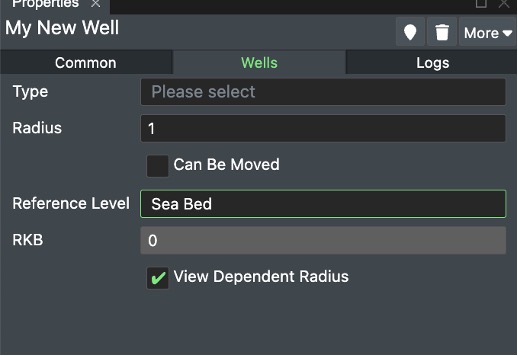
Ability to define default well reference in the project settings
Benefits
- You no longer need to select every well to input this parameter. You can set this parameter for your project, and it will apply to all the wells by default.
How to use it?
1 - In Project Settings page, select ‘General’
2 – Select the correct ‘Default Well Reference’
3 – input the ‘Default Well RKB’
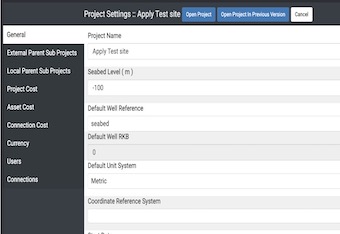
You can still modify the reference in the individual well property panel
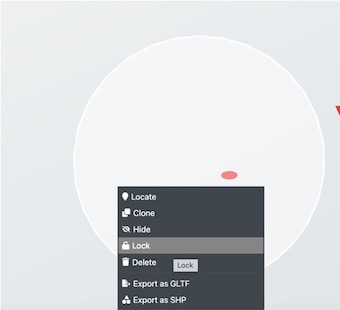
Shapes can now be locked
How to use it?
1 - Select a shape
2 - In the property box, you can use the option to lock the shape (same as for assets and connections)
3 - You can do the same action by right clicking on the shape and select ‘lock’ in the dialog box
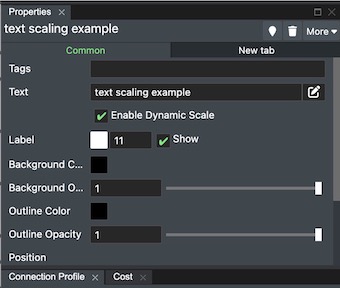
New Text Editing Options
Benefits
1 - Text can now be copied / pasted
-
If you need to display the same text box multiple times, you just create it once and copy / paste it as needed
-
Use it by right clicking your text box, and ‘copy’ then ‘paste’ or use the usual keyboard shortcuts
2 - Text can use view dependent scaling (default set to true)
How to use it?
Text can use view dependent scaling (default set to true)
1 - Select a text layer
2 - In the property box, you can use the option to enable or disable the dynamic scale by checking / unchecking the box
Items can be selected using Operator Tags and Supplier Tags in FT design URL search parameters
Benefits
-
You can now input ‘operator’ and ‘supplier’ tags for your asset(s) in the property panel
-
You can retrieve your asset(s) with tags for your API call(s)
How to use it?
1 - Select an asset
2 - In the property panel, you can add Operator Tags and Supplier Tags
Added support for recursive smart models
Benefits
-
You can now create smart models comprised of several sub models allowing you to build complex custom models
-
Warning : You need to have some smart assets in your library and add accurate metadata (contact customer success for details)
How to use it?
1 - Select your asset
2 - In the property panel, use the ‘metadata’ tab
3 - Build your own model
4 - Example with a manifold
Step 1: Select your manifold
Step 2: add a pigging loop
Step 3: add 2 cobra heads
Added rule engine for automated GIS data import
Benefits
-
You can create a set of rules when you import data from ArcGIS
-
FieldTwin will then auto-create 3D assets with connections for your field using the import rules you have created
-
You can import and export the created rule set to reuse it in multiple projects
How to use it?
1 - Select ‘import’ and then ‘Data from ArcGis using rules’
2 - Configure your ArcGis server as usual and press next until the rule set screen

3 - Start adding your rules and actions
4 - Press next and your field will be auto created
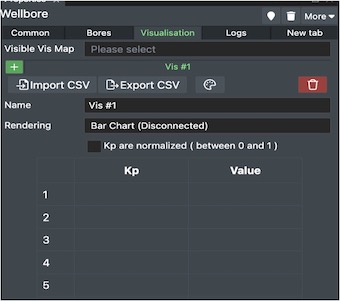
Added gradient visualisation supports for wells
Benefits
-
You can display a set of data along your wells (same as for connections that was introduced in the previous version)
-
Allows you to have visual representation of your data along a well-bore
How to use it?
1 - Select a well bore
2 - Select the new tab ‘Visualisation’
3 - Click on ‘Add visualisation’
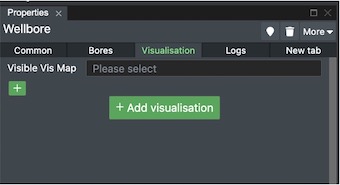
4 - Select the Visualisation you want to display on your well bore
5- Input a name
6 - Select your rendering option
7- Input your data manually or by CSV import
8 - Check the result in your viewport
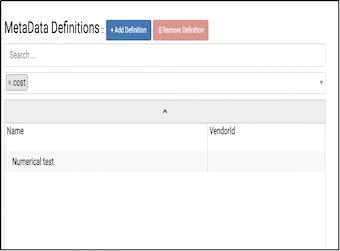
Filtering of metadata definitions using tags in Admin
Benefits
-
If you have a long list of metadata definitions, you can now filter the displaying of your metadata using tags
-
Makes UI more comfortable and metadata easier to find
How to use it?
1 - On top of the list of metadata you now have an input box allowing you to select some tags to filter by
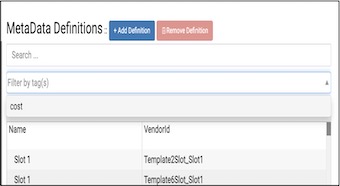
2 - If you select one or multiple tags, your list of metadata is now displaying only the metadata with these tags
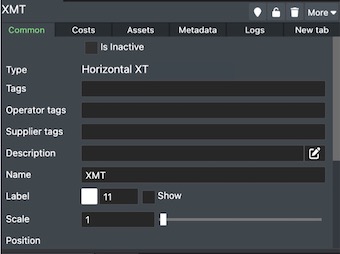
Added description field for staged assets and connections
Benefits
-
Allow you to give a long and complete description for your assets and your connections
-
It can be used to add important supplementary information (E.g., for brownfield assets etc.)
How to use it?
1 - On the property panel for assets and connections, you have a new input box: ‘Description’
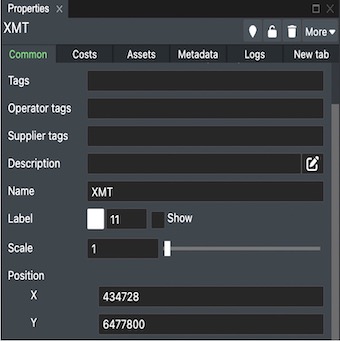
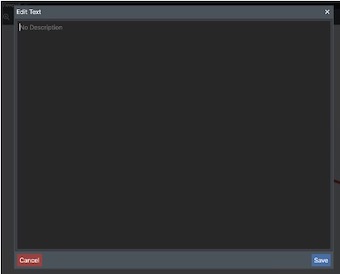
2 - You can input text directly from there or click on the edit button to display a large box for your description
Import Wellbores from Excel
How to use it?
1 - Click on the ‘Import’ button
2 - Select ‘Well from file’
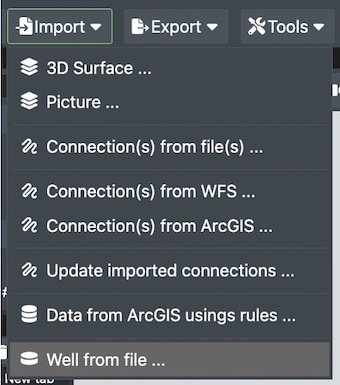
3 - Select your excel file and fill in the mapping fields based on the position of the data in the file
Added capabilities in designer and presenter to record video
Benefits
-
This option gives you the opportunity to record a video of your project.
-
This is very useful for presentations since you can show only the desired parts of your project and it does not need to be a live demo. Also, it can be included in any presentation, allowing other people that are not experts in the software to demonstrate it.
How to use it?
1 – On the Viewport options, select the new Camera button

2 – The button when selected will appear with a green colour. This means that it is recording the project display

3 – When you are finished, just click on the camera button again and the option to save your recording will appear.
