Cost Module
To better allow you to work with "What-if" costing scenarios during the field layout you have a standard "Cost" module for FieldTwin Design
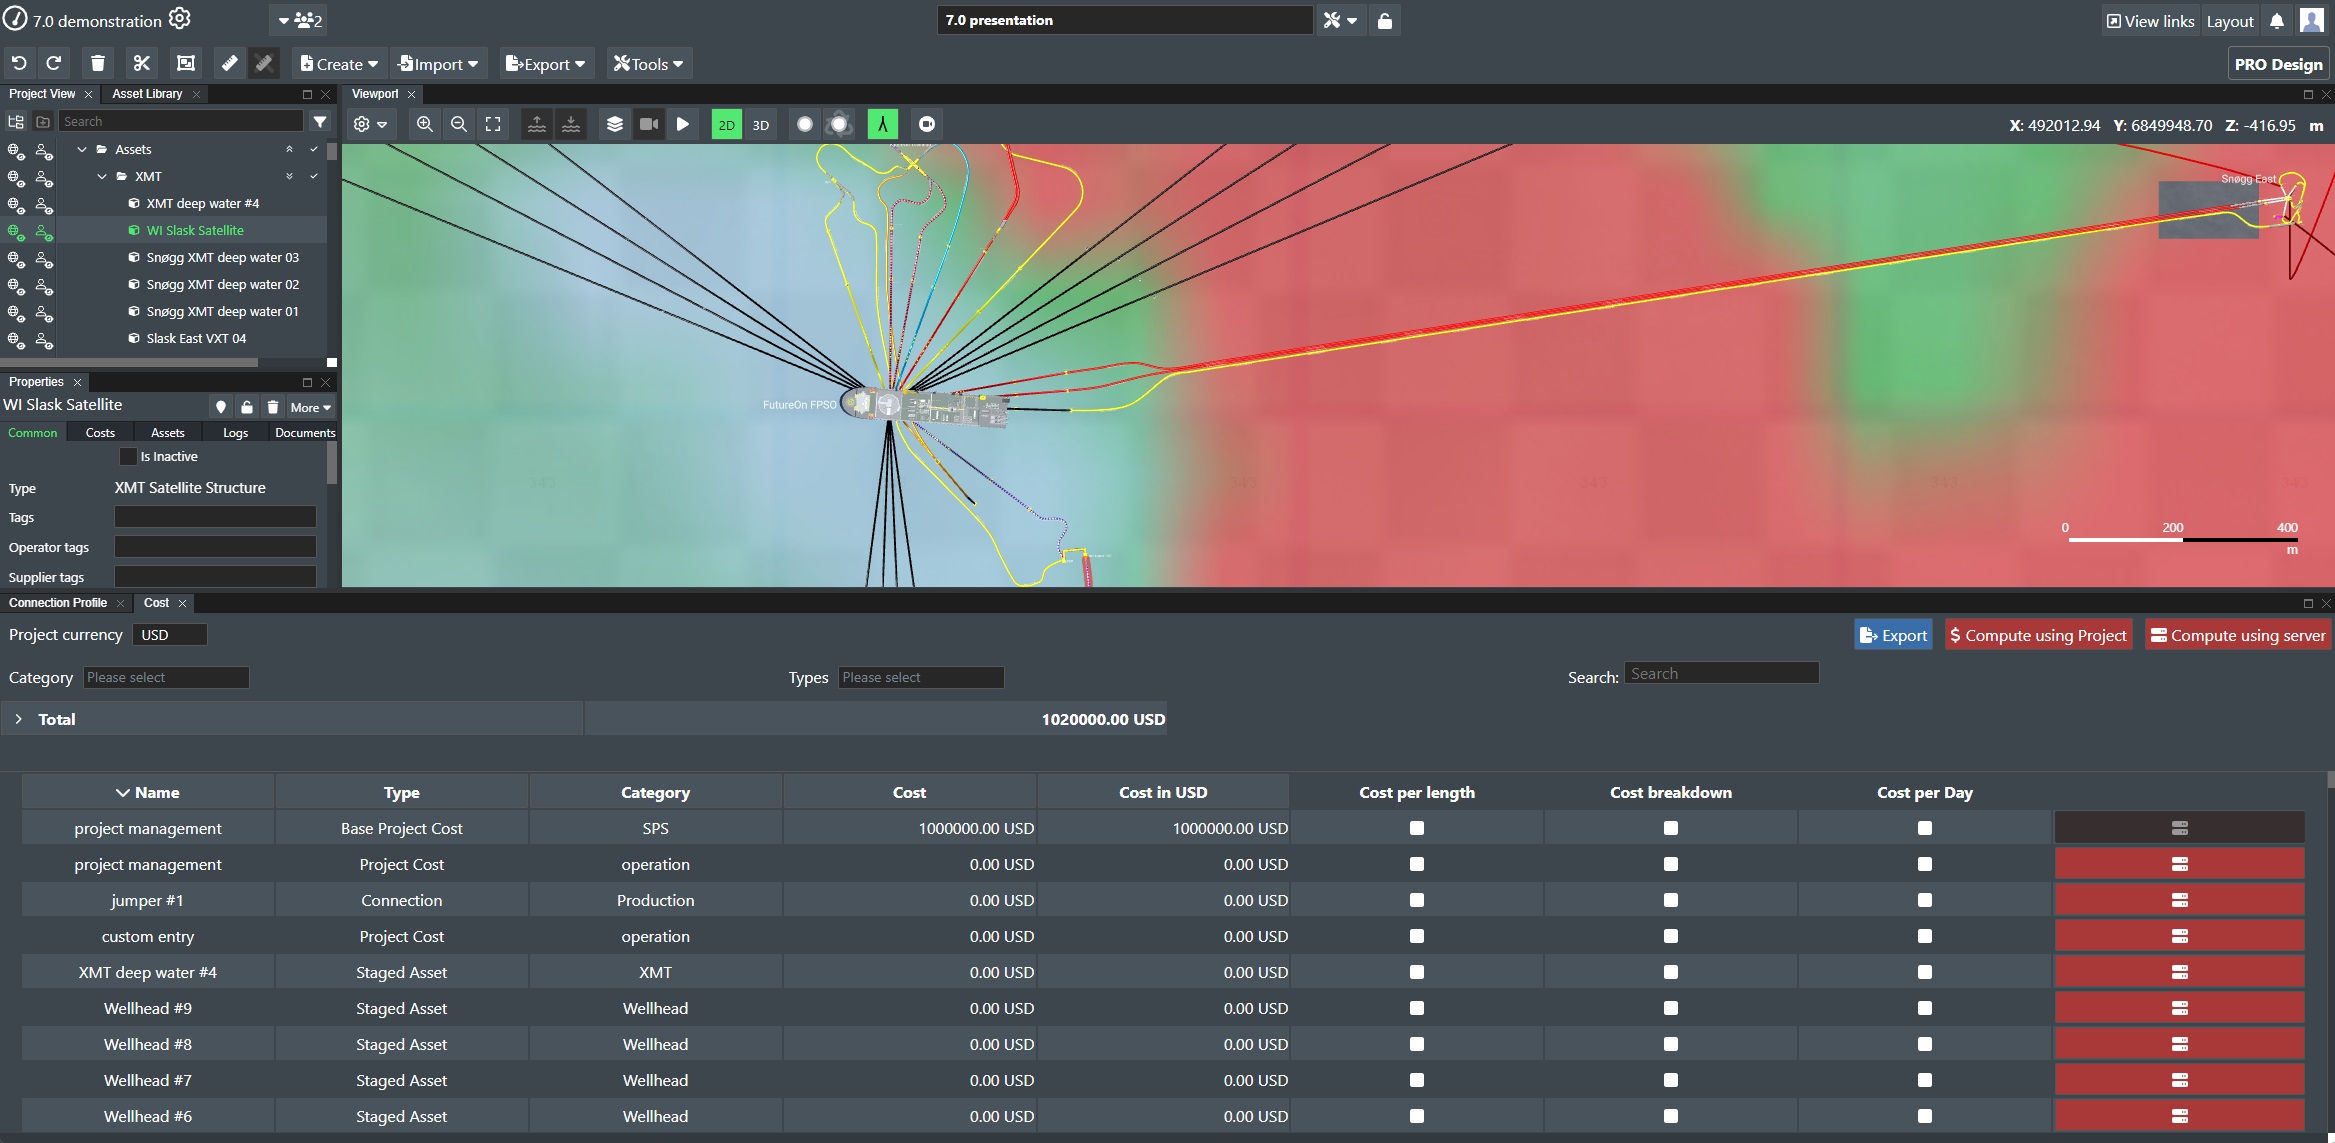
As you design a new field layout this module will automatically be itemised and summarised.
Cost Module Layout
The following section will describe the various elements of the cost module and the associated commands.
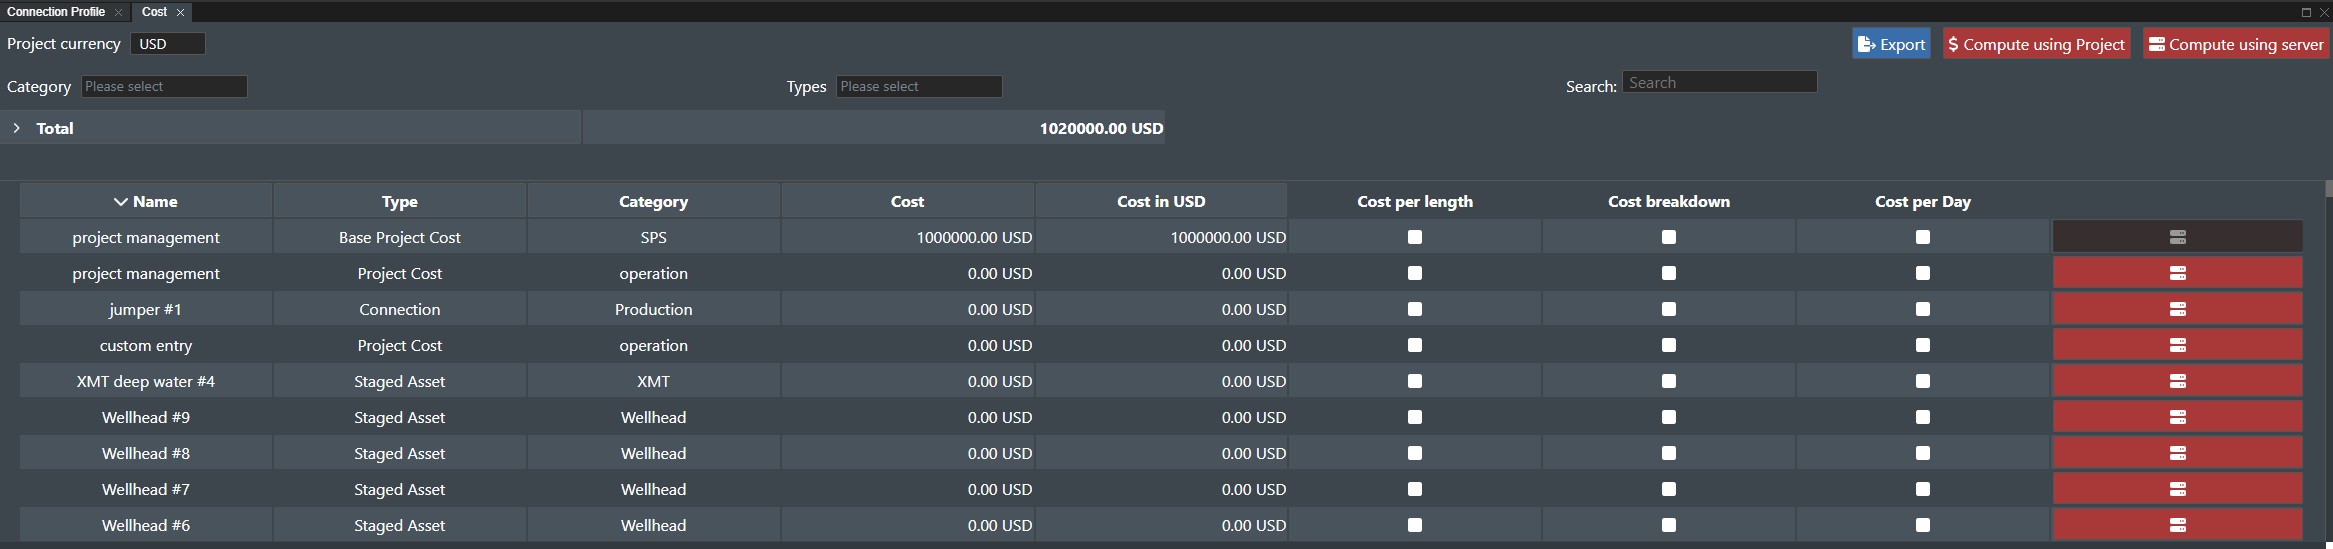
Selecting a Project Currency
The "Project Currency" drop down list allows you to select the specific currency you want to use for the project cost summation or Total Cost. See the illustration below for an example:

Project Currencies can be changed in the Project Settings.
Export
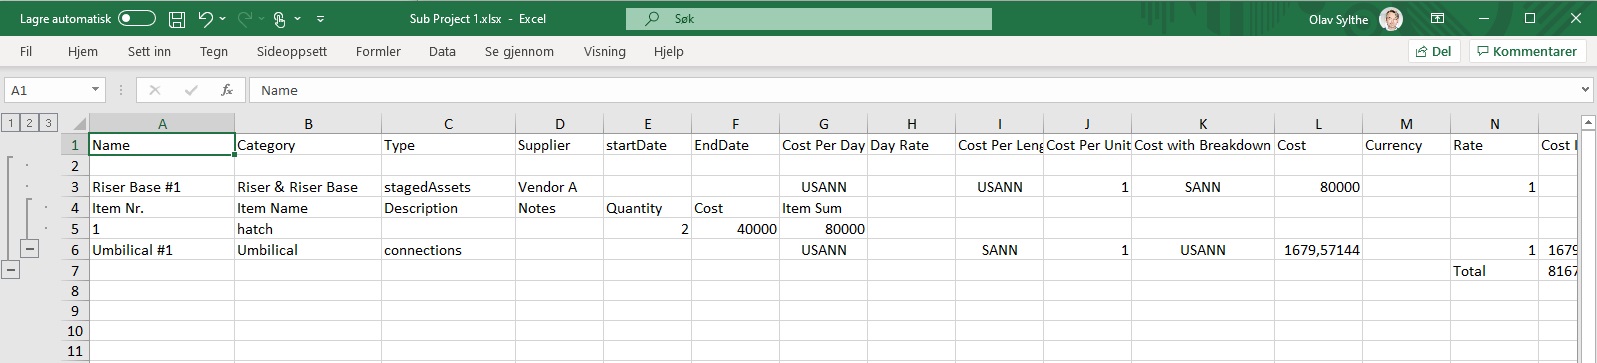
You can export the cost data for your field layout project out to a Microsoft Excel file for further editing by clicking on the "Export" button located in the topmost right corner.

When opening the exported file in Microsoft Excel you will find that it contains all the cost information from your project that has been defined.
Compute Using Project
This button will calculate costs based on the given asset cost definitions FieldTwin Design as you are used to for the project.

Compute Using Server
It is possible to develop your own integration based on our cost server computation module. This allows you to integrate with your own proprietary back-end cost computation/calculation systems that will receive queries from FieldTwin Design to compute very accurate and up to date costing. This button will do the calculations using your own integration with the cost server module for more detailed in house costing data. You will also find a Server button on the detailed cost item view for each entry. Pressing this button will then just recalculate that individual item using the cost server Integration.

The cost server configuration settings can be found under Modules in the Account Settings. For more information on the Cost Server, please contact us!
Search and selection
You can use the Category and Types drop down list to filter the cost tab as well as the Search field.
Category - Select the various defined categories e.g. "Riser & Riser base" that you want to filter the cost module display with.
Types - Select the defined types e.g. "Staged Asset" that you want to filter the cost module display with.
Search - Start typing in text to narrow down the cost module list.
Total
This section present the total cost sum of assets and connections that have a defined cost or cost computation.

Press > to expand the listing to also show the cost per category.

Cost Table
The cost table show each line item for the cost:

The table columns are as follows:
Name - The name of the asset or connection the cost is for.
Type - Shows if it is a staged asset, connection, project cost etc.
Category - Shows the corresponding cost item category.
Cost - Shows the cost of the item and the currency.
Cost in Project Currency - Shows the cost of the item in the selected project currency.
Cost per length - This is checked if the cost per length computation is selected e.g. connections.
Cost breakdown - This is checked if the cost has a breakdown cost associated to it.
Cost per day - This is checked if the date range and unit cost is involved.
Compute using server - This icon allows you to invoke a cost server computation for that line item only.
Assigning Asset Costs and Supplier
When designing a field layout the "Cost" module will automatically be itemised and summarised based on the corporate account settings for default asset cost. To change the cost for an asset in the current project there is two ways to do this.
You can simply click on the asset in the layout screen that you wish to specify cost on, and the corresponding entry in the "Costs" tab for the select asset or connection in project view can be edited as shown in the illustration below:
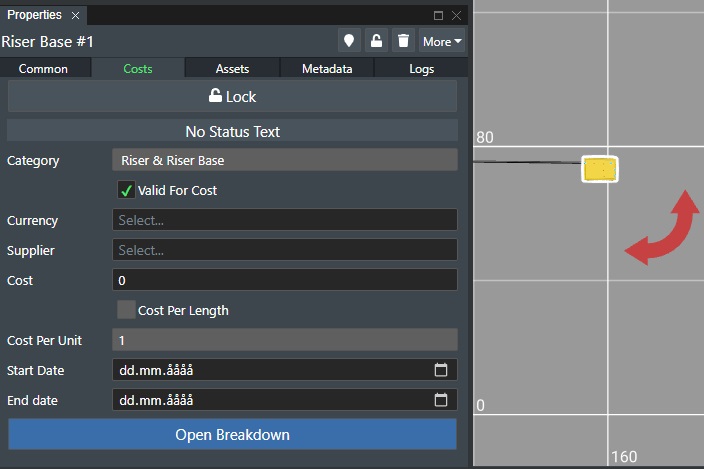
The costs tab for the selected asset will display the following fields;
No Status Text - This field will change if you are connected to a Cost Server, and will inform you of when the latest computation was done.
Lock - To lock a specific cost calculation so it cannot be changed, simply click on the Padlock icon and it will toggle between Locked and Unlocked states.
Category - This will display the category for the asset/connection. This is not editable.
Valid for cost - This box is checked as default. Uncheck it if this asset or connection should not be included in the calculation.
Currency - To set the currency to be used for that specific asset, simply select it from the drop down list.
Supplier - To define a supplier or vendor for the subsea asset, connection or vessel, you can select one from the drop-down list. You can also simply start typing in the name in this field and if the supplier is not already defined in the database you will see a line with the option to Add the new supplier appear below the edit field as shown here.

Simply select it and the supplier will now be defined for the project and is available for selection in the "Supplier field for all other assets in the current project.
Costs - To define or change the asset cost, simply assign a value in the cost field.
If you use real world scale in the stage settings and have defined the sea bed depth or loaded bathymetry data that defines the sea bed we automatically calculate the length of all connections. This also allows you now to assign a cost per unit that will automatically update in the cost module when a connection is edited.
Cost per Length - If you have selected a connection you can supply a cost per length unit e.g. meter or feet. Check this box if you want to calculate cost per length.
Cost Per Unit - If you checked the option above, supply the unit cost number here e.g. cost per meter or feet.
Start Date - You can also specify a start date for the asset cost. This information will then be exported out to MS Excel if you use the Export function and can be useful when you work with CAPEX/OPEX calculations outside of FieldTwin Design.
End Date - You can also specify a start date for the asset cost. This information will then be exported out to MS Excel if you use the Export function and can be useful when you work with CAPEX/OPEX calculations outside of FieldTwin Design.
Breakdown Cost
For all cost items e.g. assets, connections, project costs etc. you can always add breakdown cost for an object in FieldTwin Design. E.g. break down asset cost into itemised parts and assigning individual cost for each sub part you add. You will find this option several places.
Open Breakdown - Press this button to display the dialog for assigning "Cost" for individual parts as shown below:
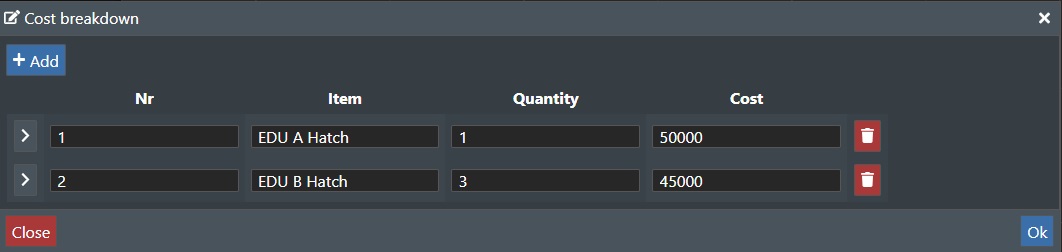
To assign cost for an individual part, simply click on the +Add button to add a new line for each part that you wish to assign the cost for. You can add information in each of the following separate fields; Nr, Item, Quantity, and Cost.
> - Press this button and the dialog will expand and show a Description and Notes field that you can add additional information into.
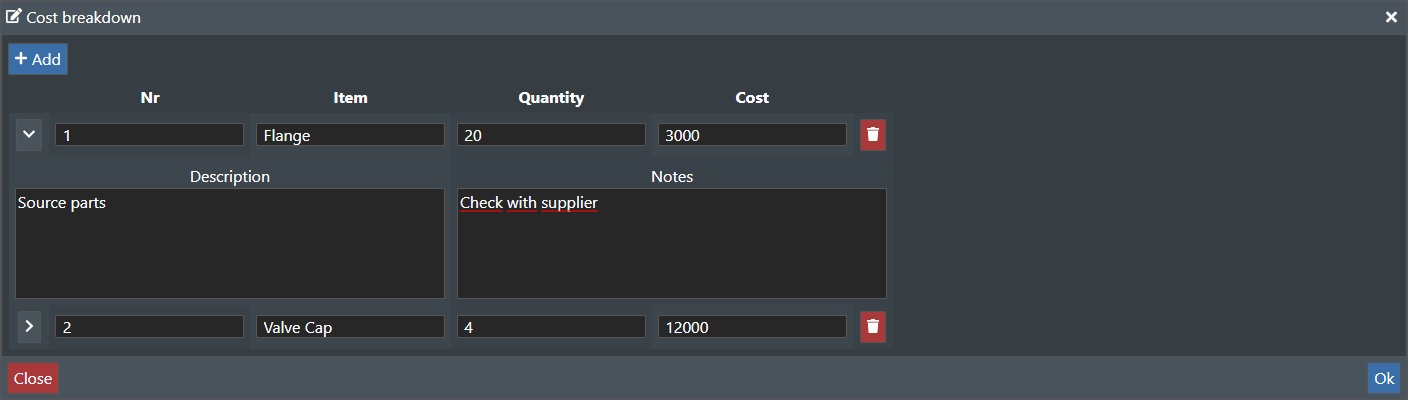
˅ - Press the down arrow to collapse the item entry again.
To delete an item from the list, simply click on the Trash icon to the right of the "Cost" field. When you are done, click on OK to accept the entries made. To exit, without saving any changes, click on the Close button.
Selecting directly in the Cost Tab
You can also bring up the cost tab for any asset or connection in the Cost Module. Simply navigate to the cost entry line you wish and click on it. It will then automatically select the asset or connection in Project View. And on the viewport the corresponding asset will also be highlighted.